Make a Country Board for Ireland! Here Is Everything You Need

Make a Country Board for Ireland! Here Is Everything You Need

Please follow and like us:
onpost_follow

Have you ever created a Country Board to kickstart your studies of a foreign country?

I did this for every single country I taught, and that is a lot of Country Boards considering I taught world culture classes to children for over 8 years!

With the changing of a country, came the changing of a Country Board.

My students loved Country Boards! They looked forward to them at the start of each session and referred to them frequently throughout the course of our classes.
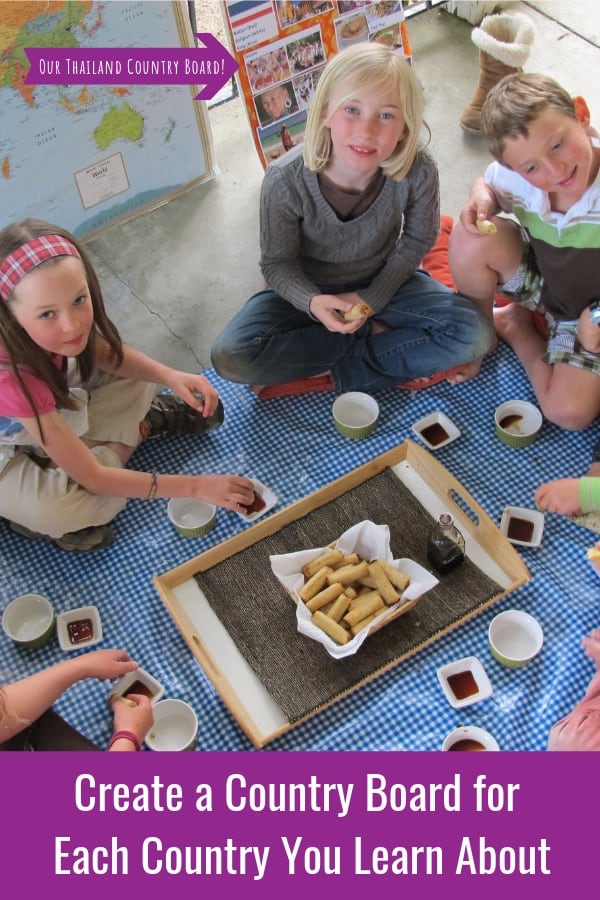
Think about it. Do you want your children to learn country facts by memorization from a boring, printed worksheet, or rather by observation from a brightly colored, visually appealing country board that is accessible to them all the time?

The answer is clear. I think it’s high time you give a Country Board a try, don’t you?

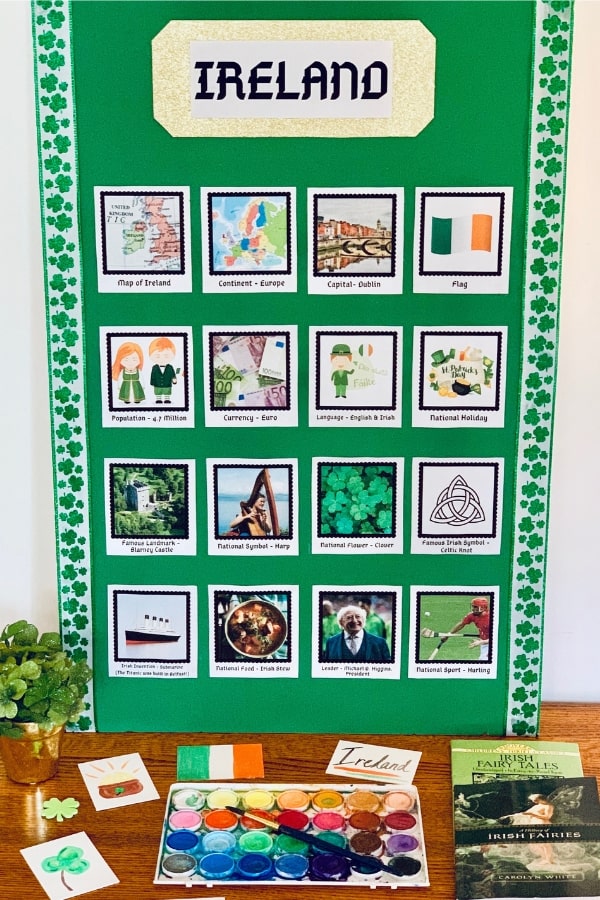
In this blog post, I will teach you the basics of making a country board using Ireland as an example.

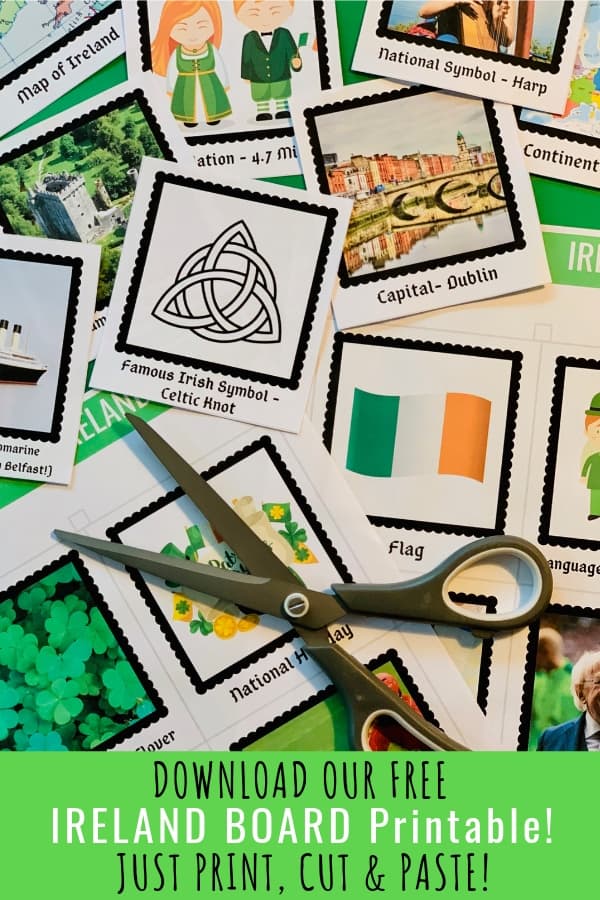
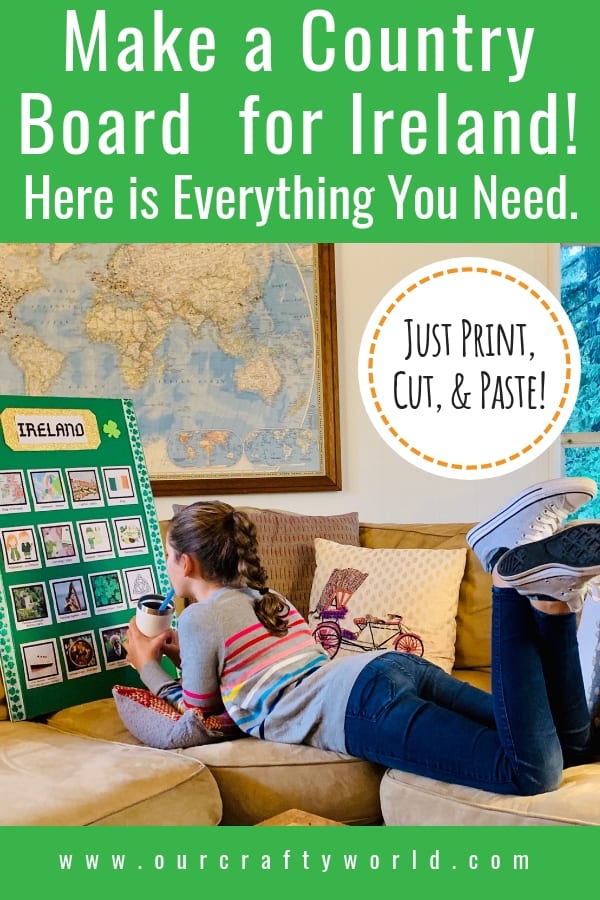
When you are finished reading this post, be sure to download our FREE Ireland Country Board printable. I have created all of the board titles and images for you so all you have to do is print, cut and paste! For detailed directions, however, please see below.

We especially recommend this Ireland Board as a wonderful precursor to St. Patrick’s Day. 

HOW TO MAKE A COUNTRY BOARD
SUPPLIES

Green foam board
Copy paper
Scissors
Adhesive (glue stick, tape or glue gun)
Decorative paper or accouterments (optional)

COUNTRY TITLE

Your board needs a country title. To do this, type the name of the country in a very large font that will roughly span the length of the top of your board.

COUNTRY FACT TITLES

Decide from the list below (or your own list) which country facts you want to include on your board. Type up these titles in a font size that fits your board.

PHOTOS

The next step is to find photos online that you can use to go with each country fact. As you find each photo, copy/paste them into your document to go above each country fact.

Tip: Test your font and photo size to make sure all of your country facts will fit on your board! I do this by formatting one photo and title and then printing it to double-check its size.

Our FREE Ireland Country Board printable is a good example of what size your photos should be in order to fit on the board.

COUNTRY FACTS

Below is a list of country facts I have always referred to when making my Country Board. Depending on the country, I will pick and choose which facts I want to include on my board. This is always a tough decision for me because I want to include them all!

Country Map
Continent
Capital
Population
Flag
Language
Currency
Current leader
National Symbols (national food, national animal, etc.)
National holidays
Famous landmarks
Inventions
Religion(s)
Modes of Transportation
Coat of Arms
Distance from your country

HOW TO DISPLAY YOUR COUNTRY BOARD
Once your Country Board is complete, it’s time to put it up for display so that your children or students can begin learning about a new country!

AT HOME

Here are a few great reasons to make a Country Board for your home:

-It is a great precursor to an upcoming world holiday and will add more depth and meaning to your celebrations (we recommend our FREE Ireland Country Board printable as a precursor to St. Patrick’s Day!)

-It will enhance your child’s studies of a particular country at school with the research necessary to put the board together.

-It will provide your family with information about a country you plan to travel to so that when you land in-country, your family feels a  sense of familiarity, not overwhelm. I recently created a Sri Lanka Board for our family!

IN YOUR CLASSROOM

As we mentioned above, a Country Board is a much more visually appealing way than printed worksheets for children to grasp and retain basic facts about a country.

Having a Country Board in your classroom will generate excitement and discussion. It will be a great reference point for everything related to your curriculum.

Every ounce of effort it takes to make a Country Board for your classroom is so very worth it for your students.

IN YOUR HOMESCHOOL

Making a Country Board is a great small-group project for any homeschool group. Not to mention, each fact on the board could present a new avenue for exploration and further learning.

In homeschooling, the sky’s the limit, so use your Country Board as a solid foundation from which to soar.
DOWNLOAD OUR FREE IRELAND COUNTRY BOARD!

Please follow and like us:
onpost_follow
4 Irish Recipes To Make a Perfect St. Patrick’s Day Family Dinner

4 Irish Recipes To Make a Perfect St. Patrick’s Day Family Dinner

Please follow and like us:
onpost_follow
There is nothing more cozy and homey than Irish recipes.

Every Irish recipe I have made has filled my home with aromas of goodness.

I almost feel they should only be eaten on rainy days so they can properly serve their purpose of warming your belly and filling you up.

That said, we are expecting a beautifully sunny day here in the Bay Area this St. Patrick’s Day and that would never stop me from making these Irish recipes to enjoy with my family!

In this post, we will give you 4 recipes to make the perfect St. Patrick’s Day family dinner.

St. Patrick’s Day Recipes
Okay, let’s get right to the recipes!

4 IRISH RECIPES TO MAKE A PERFECT ST. PATRICK’S DAY FAMILY DINNER

These recipes, if made together, provide a well-rounded family dinner that will literally leave your family licking their fingers and chops!
MAIN COURSE: IRISH STEW
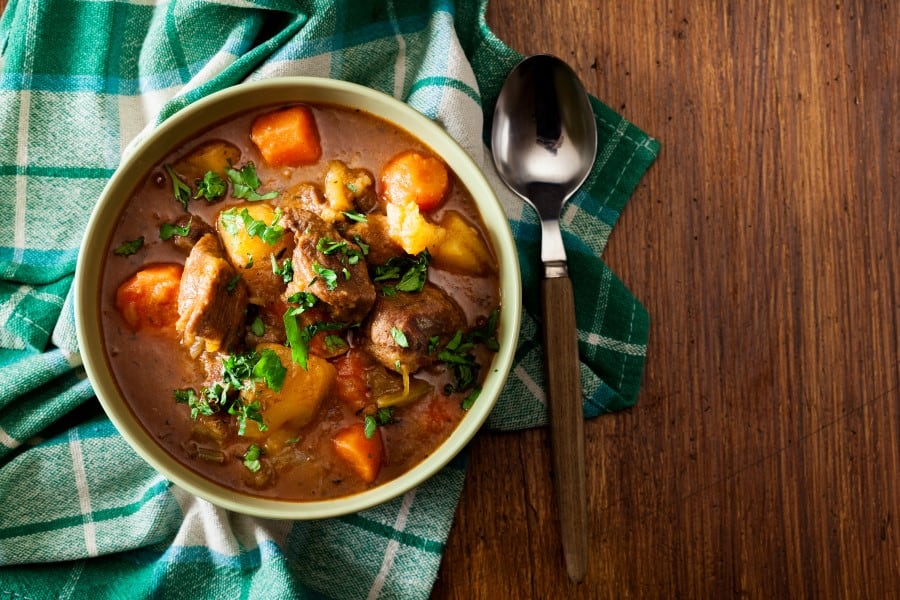
Irish Stew Recipe for St. Patrick's Day
We find this much more appealing to children than Corned Beef and Cabbage. Not to mention, the Irish Soda Bread we hope you make is the perfect dipping accompaniment.

Everyone knows that warm stew + warm bread = LOVE!

CLICK HERE FOR OUR ST. PATRICK’S DAY RECIPE BUNDLE.

SIDE DISH: IRISH SODA BREAD
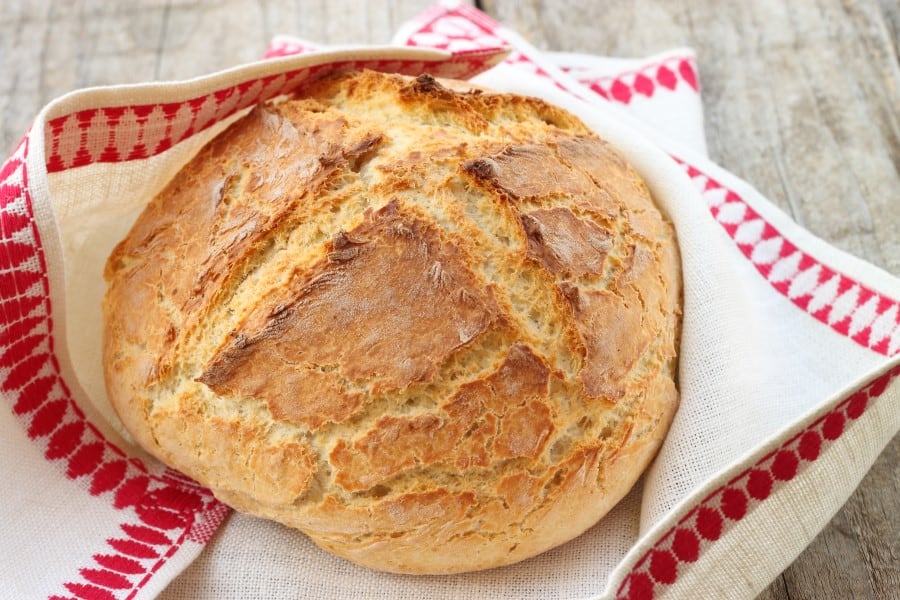
Irish Soda Bread Recipe
When your Irish Stew is baking succulently in the oven, it is a great time to prepare the Irish Soda Bread.

Put emphasis on searing an “X” on the top of your loaf and let your family know that some people believe that the “X” was cut into the bread to ward off evil, and other’s believe it was to let fairies out of the bread.

A fun family discussion might entail asking each family member their theory before you tell them, or asking everyone to come up with their own unique belief about why there is “X” in the bread.

CLICK HERE FOR OUR ST. PATRICK’S DAY RECIPE BUNDLE.

CONDIMENT: HOMEMADE BUTTER
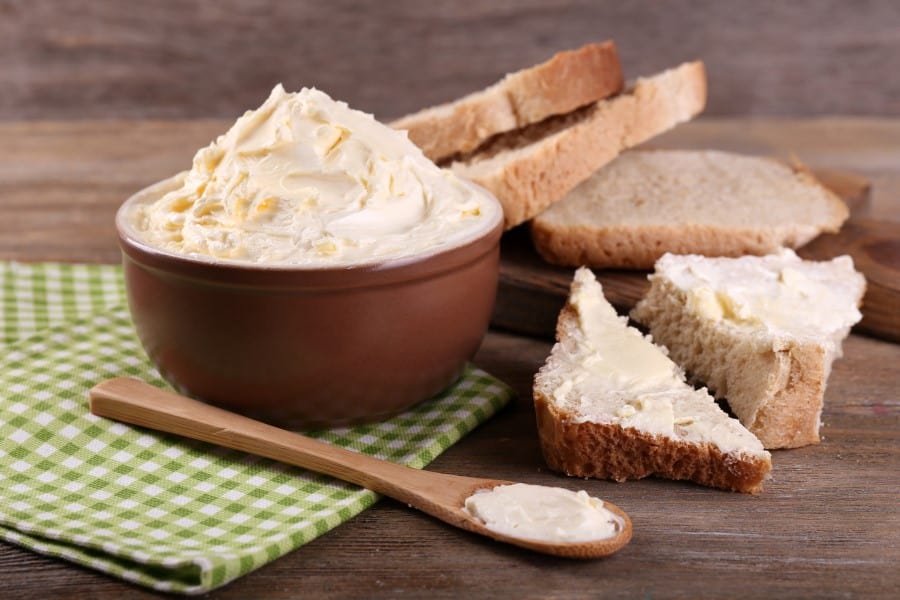
homemade butter recipe
Never easier, never tastier, homemade butter is in one word, a TREAT!

TIP: Don’t forget the salt, and make sure to allow time to shake the butter to completion. When complete, it should look like the butter in the picture below.

When I make this with my students, I always play Irish music while the shakin’ occurs. We would sit in a circle and when the music stopped, the jar would be passed to the next person to continue with the shaking when the music started up again. They loved it!

You could make butter with your family the day before your Irish family dinner.

CLICK HERE FOR OUR ST. PATRICK’S DAY RECIPE BUNDLE.

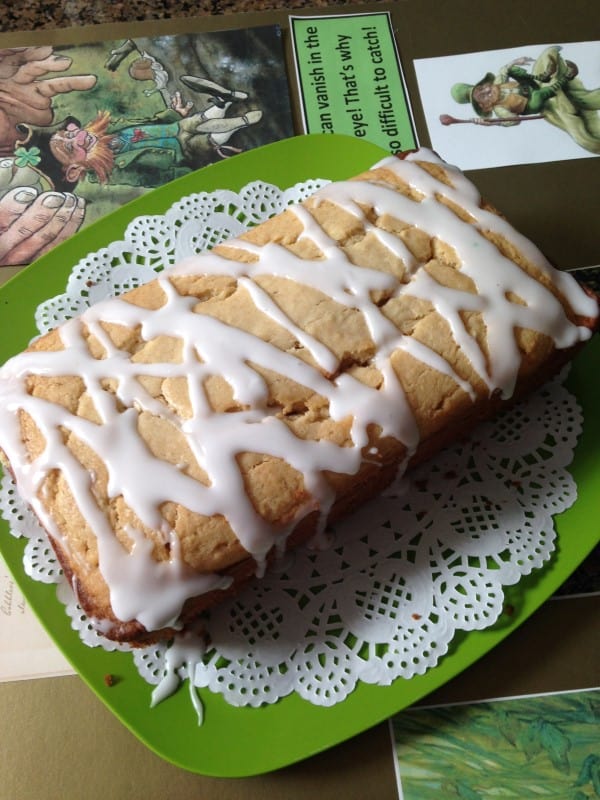
DESSERT: GLAZED IRISH TEA CAKE
St. Patrick's Day Recipe Irish Tea Cake
In a world, YUM. The perfect dessert for your Irish family dinner.

This recipe cooks at the same temperature as the Irish Soda Bread conveniently.

Your house will smell so good, so homey, and so Irish!

If you have Irish Tea on hand, make a pot for everyone to enjoy with their Tea Cake. Be sure to offer up a little milk, cream or sugar.
It will be the perfect ending to your St. Patrick’s Day Family Dinner.
CLICK HERE FOR OUR ST. PATRICK’S DAY RECIPE BUNDLE.
IRISH JOKES FOR YOUR ST. PATRICK’S DAY FAMILY DINNER
What happens if you cross poison ivy with a four-leaf clover?

Why did the leprechaun walk out of the house?

What do you call a big Irish spider?

If you want to know the answer to these riddles, then you’re in luck.

As a fun bonus, we have added a page of St. Patrick’s Day jokes to enjoy with your family at your St. Patrick’s Day family dinner.

After all, those who cook together, eat together, learn together, and laugh together!

HAPPY ST. PATRICK’S DAY! 
Please follow and like us:
onpost_follow
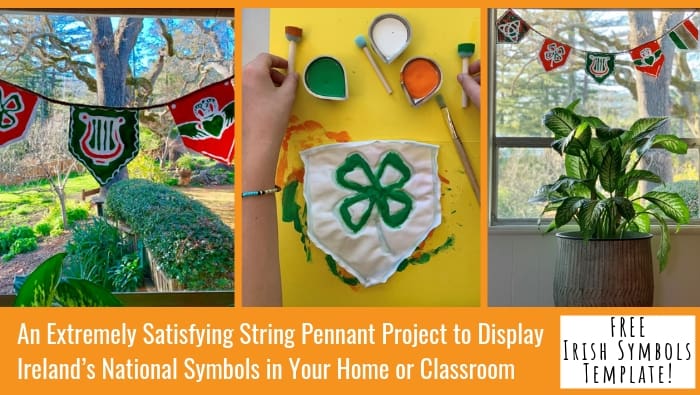
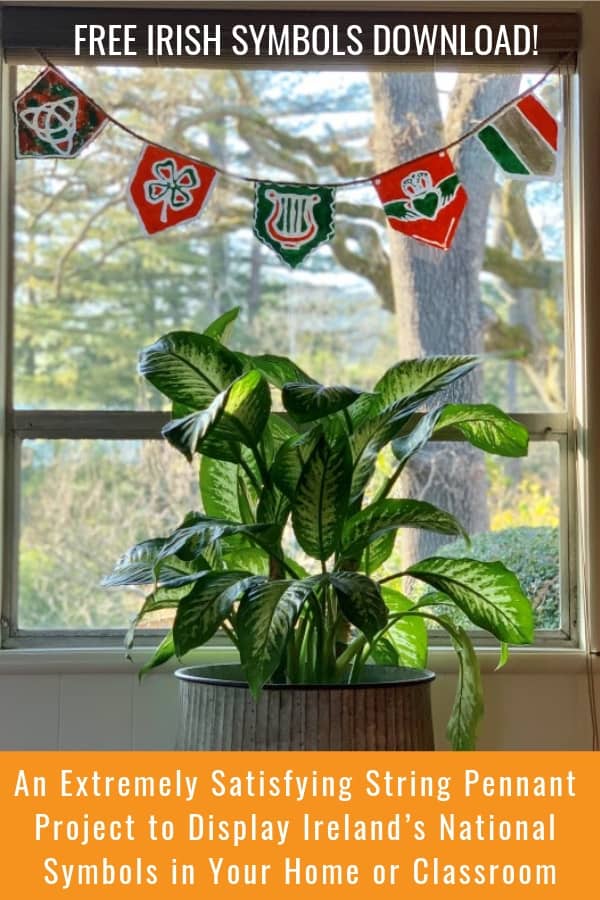
An Extremely Satisfying String Pennant Project to Display Ireland’s National Symbols in Your Home or Classroom

An Extremely Satisfying String Pennant Project to Display Ireland’s National Symbols in Your Home or Classroom

Please follow and like us:
onpost_follow

I know the first question you are going to ask.

Why are you using “extremely satisfying” and “string pennant” in the same sentence?

I’ll tell you why…at least why this is the case for me.

I LOVE TRACING THINGS! DO YOU?

When I was little my mom bought me books of tracing paper. I would carefully tear a page from the book and lay it on top of one of my favorite pictures from any of my favorite books.

I would sharpen the heck out of my No. 2 pencil and then I would sit and trace the pictures so diligently, gently lifting the page without shifting the page, to look underneath if I felt I was off track.

I did this for hours.

And ya know what? It was sooo satisfying. Meditative really.

St. Patrick's Day craft for kids is making a pennant with Irish Symbols
TRACING PROJECTS TRANSFORM ANY MOOD TO ONE OF CALM AND FOCUS

At times it would consume me so much so that I tuned the world out altogether, missing my mom’s multitude of calls to come to dinner, help out in the kitchen, or get ready for bed.

The best part came when all the tracing was complete and I could lift the whole page off the book for the first time.

It felt like such an accomplishment as if I were the original artist of each picture I traced.

A St. Patrick's Day craft for kids string pennant Irish symbols
ADDING COLOR TO A TRACING PROJECT GENERATES EXCITEMENT!

I would gather my markers (the fat ones that smelled of grape, cherry, licorice…you know the ones) and add color to my masterpiece, little by little.

I hung my favorites in a little nook underneath our staircase as well as on the wall above my bed. My not-so-favorites I kept in a folder and would tinker at improving them with additional color so as to make them hang-worthy.

A St. Patrick's Day craft for kids string pennant Irish symbols
HERE ARE THE BENEFITS OF TRACING…

Just for fun, I Googled “What are the benefits of tracing?” and look what came up: 

“Tracing can help children develop fine motor skills, which can aid them with other tasks, such as learning to write. It also helps students with developmental disabilities to develop math and language skills. Other benefits of tracing include improvement in hand/eye coordination, dexterity, and spatial awareness.”

BAM. Good for all learners no matter what.

Ireland craft for kids
LET’S GET STARTED WITH THIS TRACING PROJECT!

Here is how to make An Extremely Satisfying String Pennant Project to Display Ireland’s National Symbols in Your Home or Classroom:

SUPPLIES:

Ireland String Pennant Template
Scissors
100% white, cotton fabric (ask the experts at the fabric store what they recommend)
Blue gel glue
Acrylic paint (your colors of choice)
Paintbrushes
Glue gun/sticks
Rope/Ribbon for hanging your pennants on

DIRECTIONS:

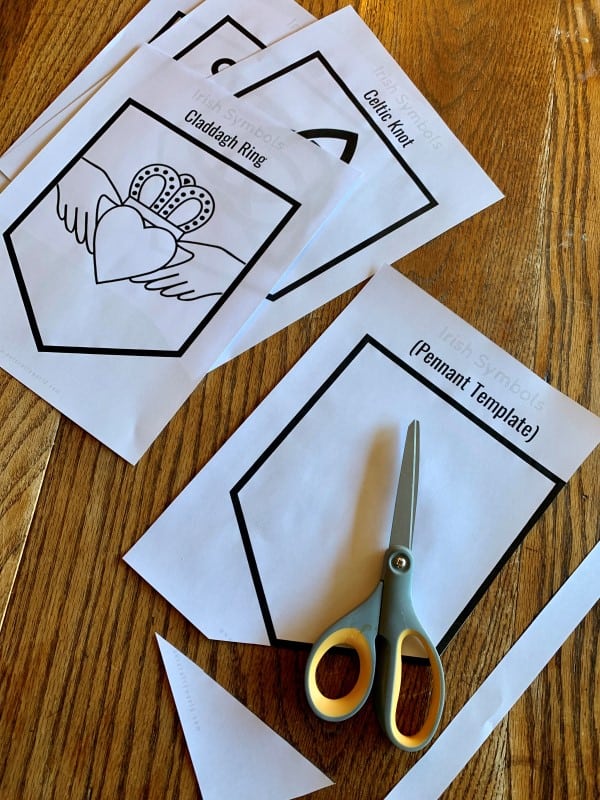
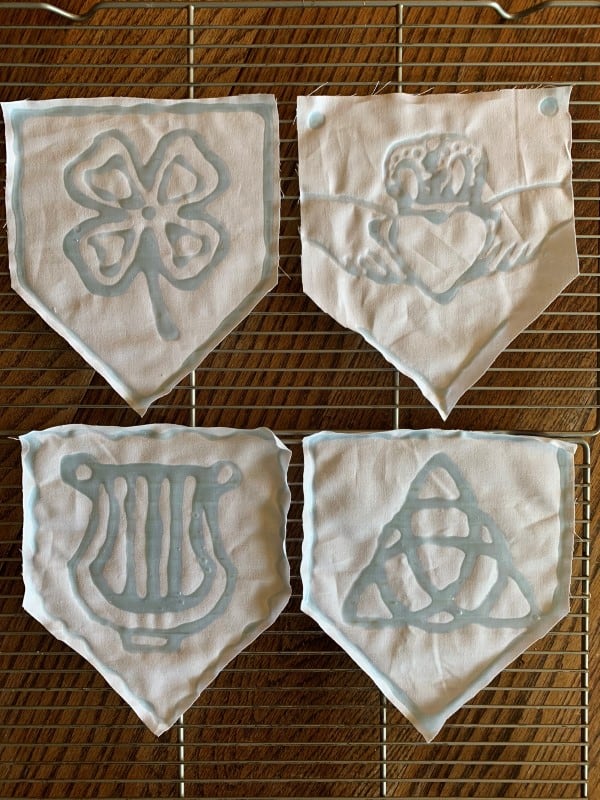
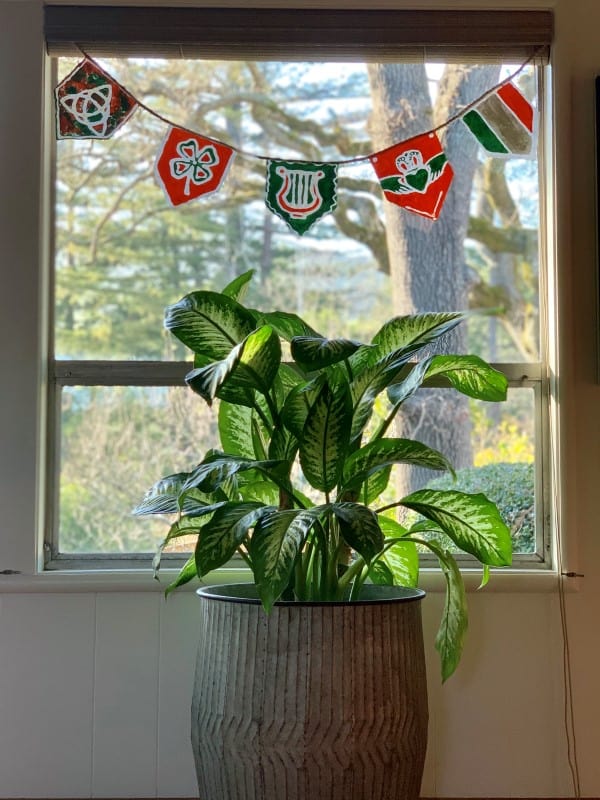
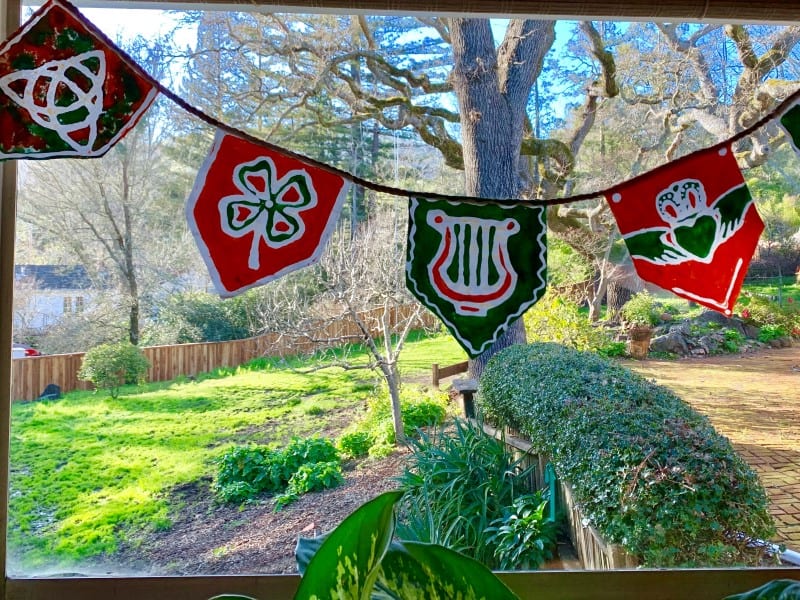
1. If you choose to, print out our FREE Ireland String Pennant Template. This template provides you with the pennant shape as well as a harp, Claddagh ring, shamrock, and flag template to trace.

2. Use a pencil to lightly trace the pennant shape (for as many pennants as you want to make) on 100% cotton white fabric.

3. Cut out each fabric pennant.

A St. Patrick's Day craft for kids or an Ireland Craft for kids
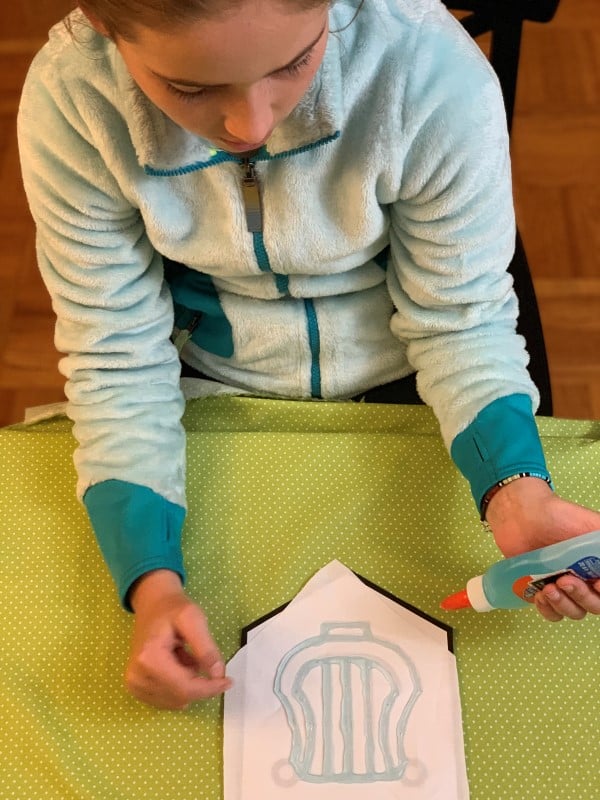
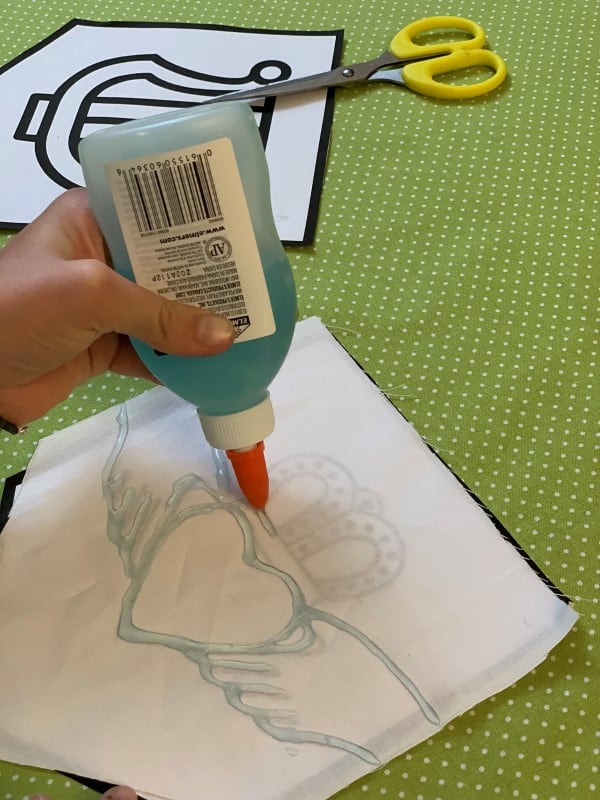
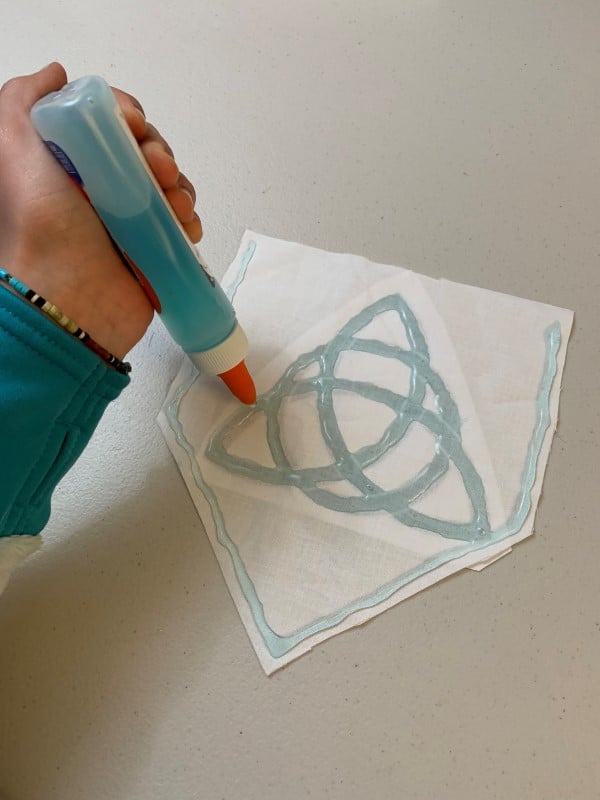
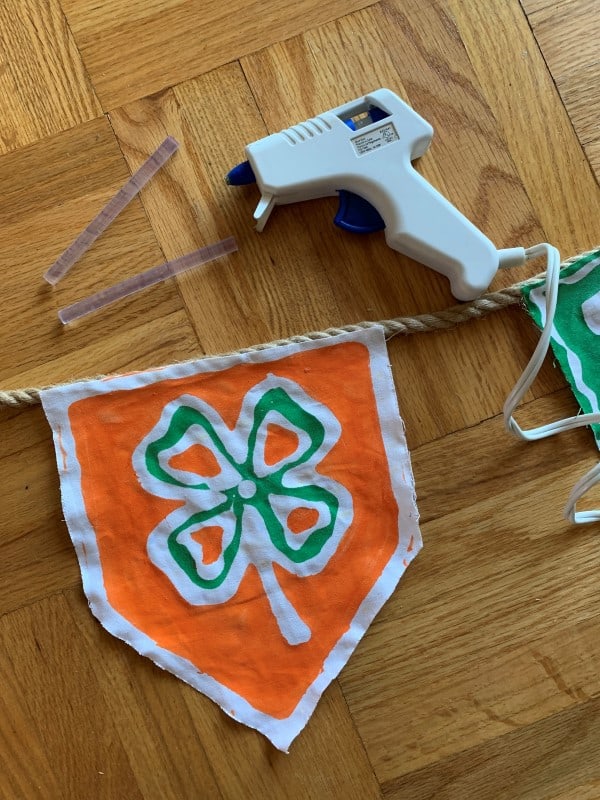
4. Lay a fabric pennant over an Ireland symbol and using blue gel glue, trace each symbol in glue.

TIP: Be sure to adjust the nozzle and flow of glue prior to starting. Do so by twisting the orange lid of the nozzle and squeezing out glue on a scrap piece of fabric or paper. We have made our Irish symbol templates bold to ensure easier tracing, but you do not have to make your lines as thick as the ones in the template.

Let the glue dry overnight, or longer depending on how thick your glue lines are.

Irish String Pennant for St. Patrick's Day craft for kids
A St. Patrick's Day craft for kids or an Ireland Craft for kids
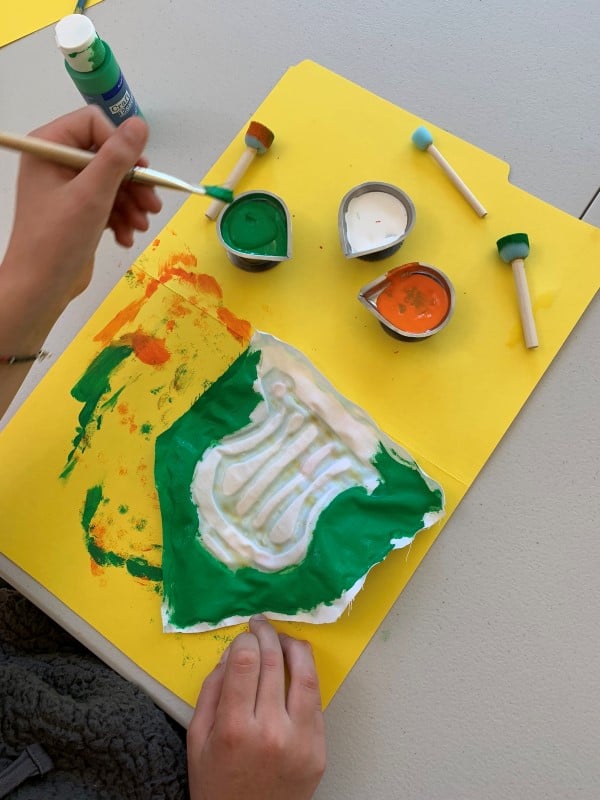
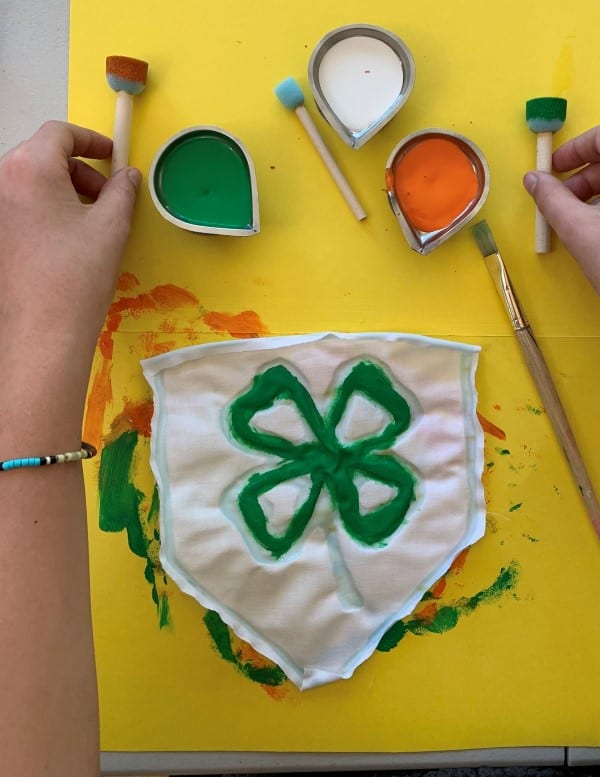
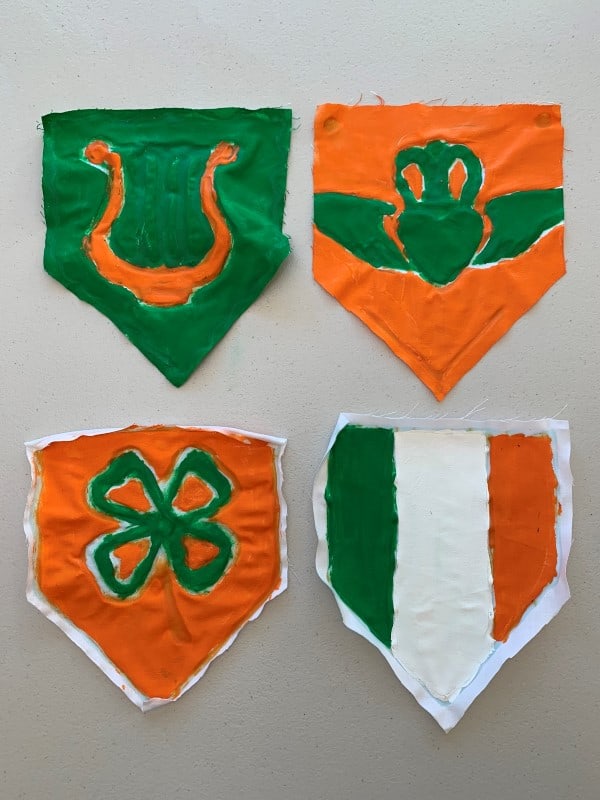
5. Once dry, it is time to paint and add color! Use acrylic paint (believe me, acrylic paint makes for the brightest colors in the end) to paint your pennant to your liking. There is no right or wrong so let your children have fun by giving them free rein with this part of the project. Every pennant will turn out colorful and festive!

TIP: Be sure to paint right up and even a bit onto the glue lines to ensure crisp edges.

Let the paint dry overnight, or longer depending on the thickness of your paint.

A St. Patrick's Day craft for kids or an Ireland Craft for kids
An-Extremely-Satisfying-String-Pennant-Project-to-Display-Ireland’s-National-Symbols-in-Your-Home-or-Classroom
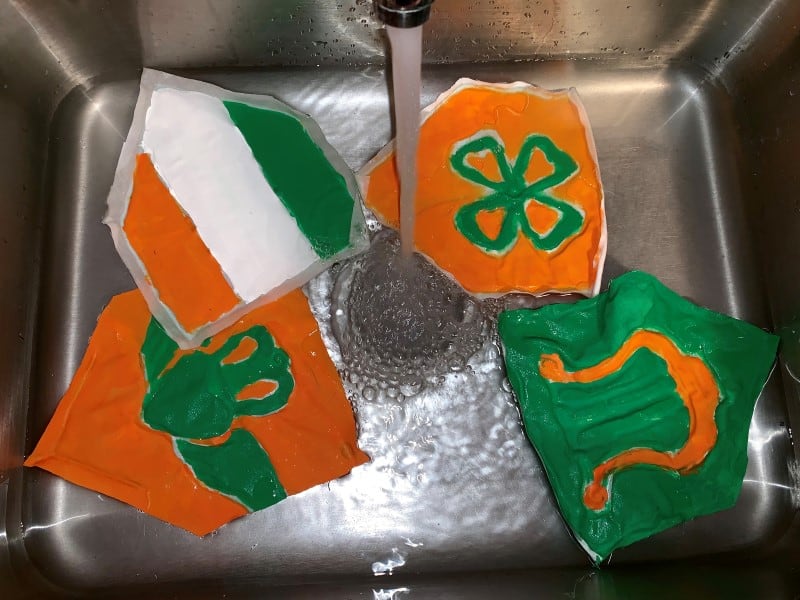
6. When the paint is dry, soak your pennants in very warm (closer to hot) water for at least 30 minutes.

7. Take a sponge and lightly wipe along the glue lines (underwater if you can). Have children feel for the sliminess of the glue underwater and if necessary, use their fingernail to lightly scrape away the thick parts of the glue. Try your hardest to remove all the glue but don’t stress if this does not happen!

8. Lay out the wet pennants on a dry towel or wire rack. I like the wire rack because they tend to dry faster this way and I am always eager to move on to the next step!

Painting an Irish Pennant for a St. Patrick's Day Craft for kids
9. At this point, it is time to add your pennants to a rope or string. I chose a thick, jute rope because it felt very Ireland-y to me, but this is up to you. I bought this rope at Michaels.

10. Using a glue gun, adhere each pennant to the rope. The amount of space in between is up to you. You may want to decide where you are going to hang your pennant, buy a rope that works for that length and then space your pennants accordingly.

A St. Patrick's Day craft for kids or an Ireland Craft for kids
11. Hang your rope and enjoy the beauty of Ireland in your home or classroom! Be sure to store your Ireland String Pennant to use as an Ireland or St. Patrick’s Day decoration for years to come! It is quite a beautiful keepsake.
An Ireland and St. Patrick's Day craft for kids
A fun Ireland craft for kids
DON’T FORGET TO DOWNLOAD OUR FREE IRELAND STRING PENNANT TEMPLATE HERE!
If you have any questions or comments, please leave them in the Comments Box below.

We always love hearing from you!

Please follow and like us:
onpost_follow
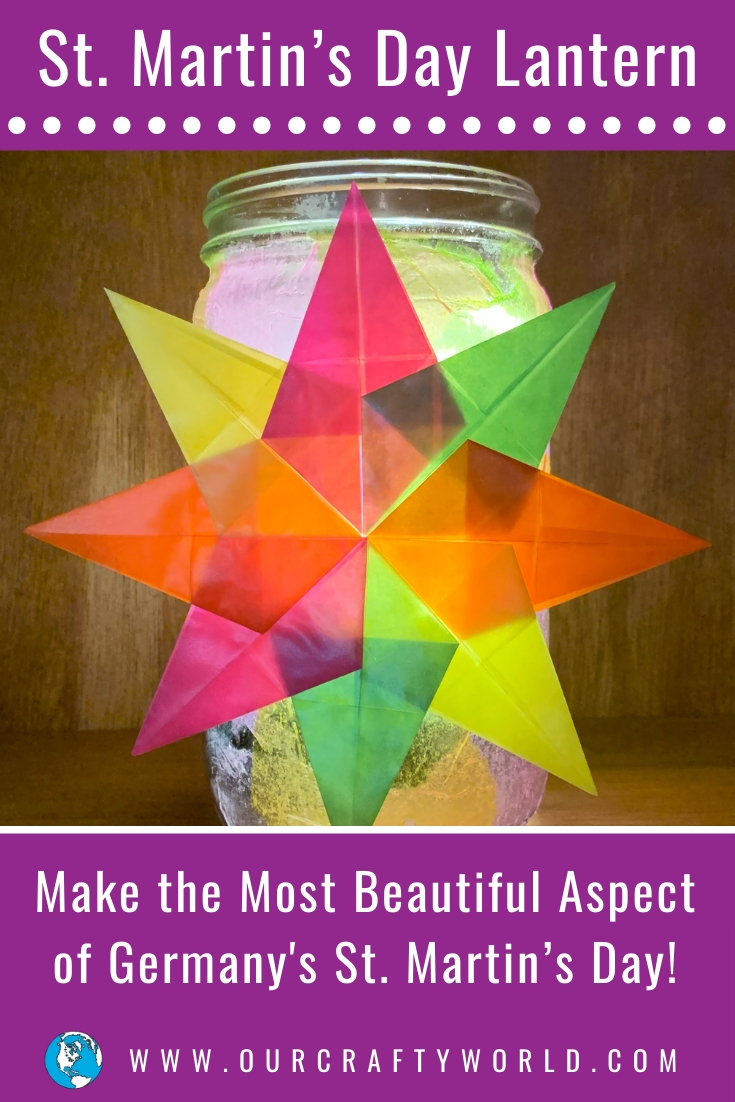
St. Martin’s Day Lanterns – A Germany Craft for Kids

St. Martin’s Day Lanterns – A Germany Craft for Kids

Please follow and like us:
onpost_follow

If you read my blog post about baking a Weckman (German doughboy) to celebrate Germany’s St. Martin’s Day, then here is a great Germany craft for kids to take your celebration or studies one step further.

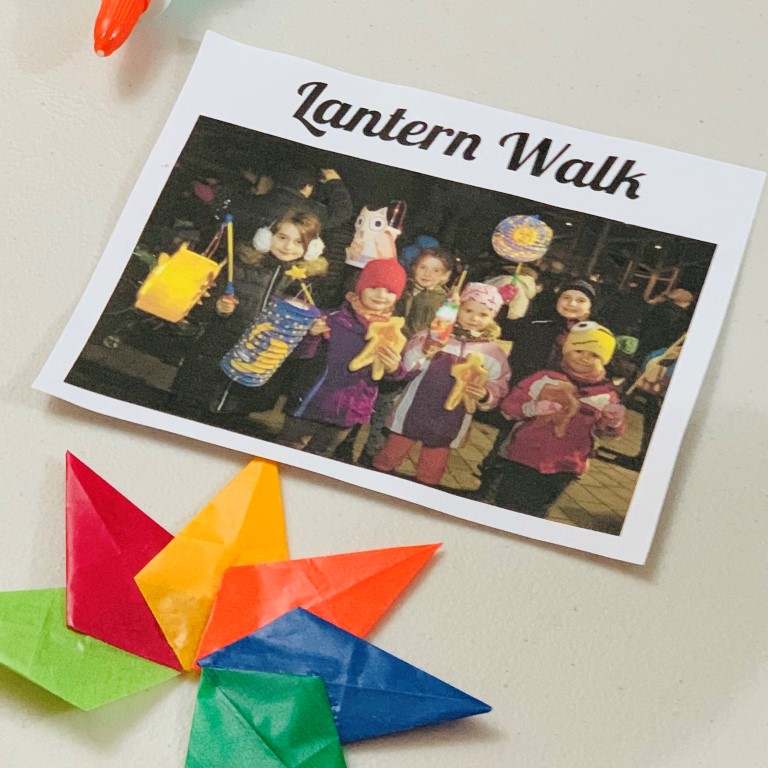
One of the many traditions for German families on St. Martin’s Day is a nighttime procession to a community bonfire at the end of a festive evening.

During the procession, children carry lanterns made of paper, probably made in school or at home.

While paper lanterns are quite beautiful and more traditional, I chose jar lanterns for the students in my Germany class because they are more likely to stand the test of time, which means they can be enjoyed longer. 

SUPPLIES

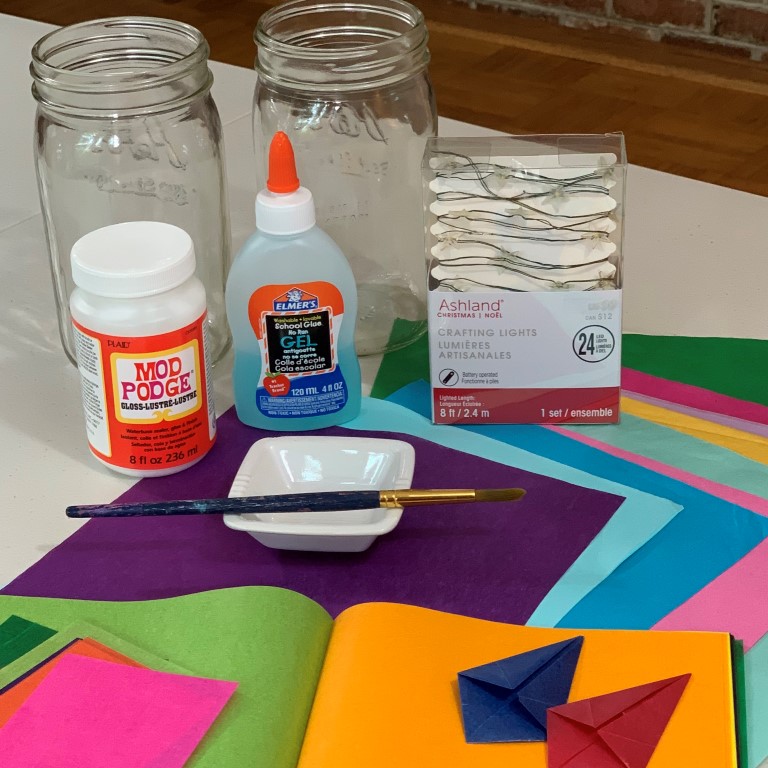
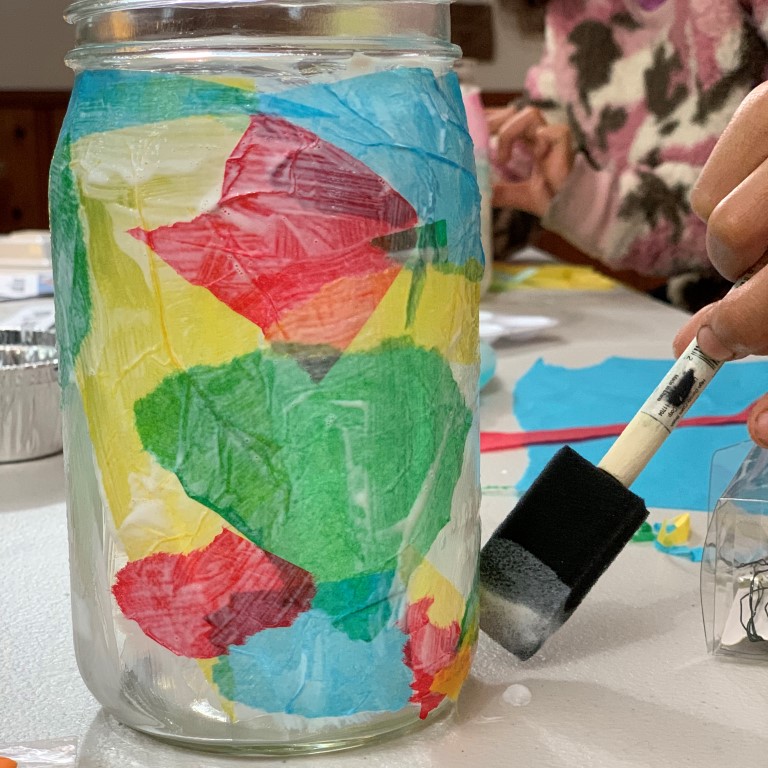
For this project, you will need tissue paper in varying colors, Mod Podge, a paintbrush or sponge brush, a large jar, gel glue, a short strand of battery-powered white lights, and kite paper.

APPLY TISSUE PAPER TO THE JAR

First, have your children or students tear the tissue paper into different sized pieces. Make sure there are no straight edges on the pieces of tissue paper.

Glue the torn tissue paper pieces onto the jar with Mod Podge, overlapping at the edges just slightly.

Set the jars aside to dry overnigt.

MAKE THE STAR

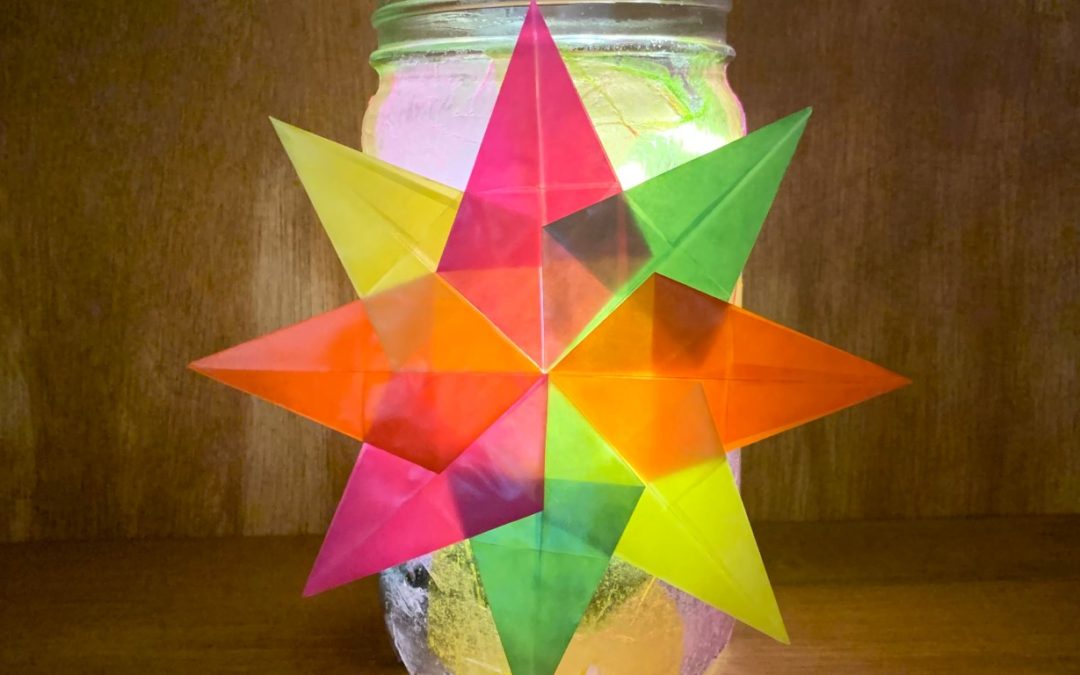
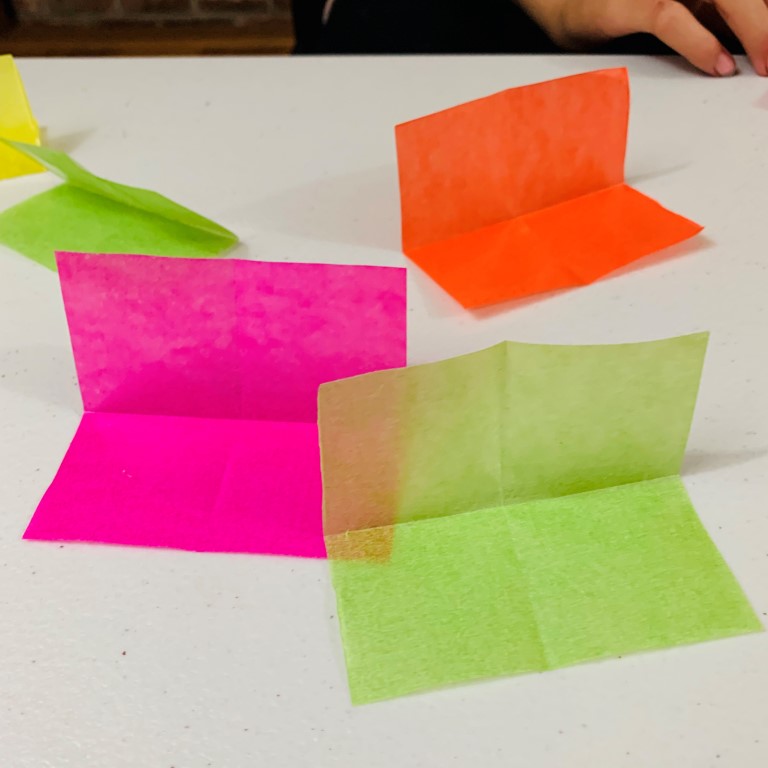
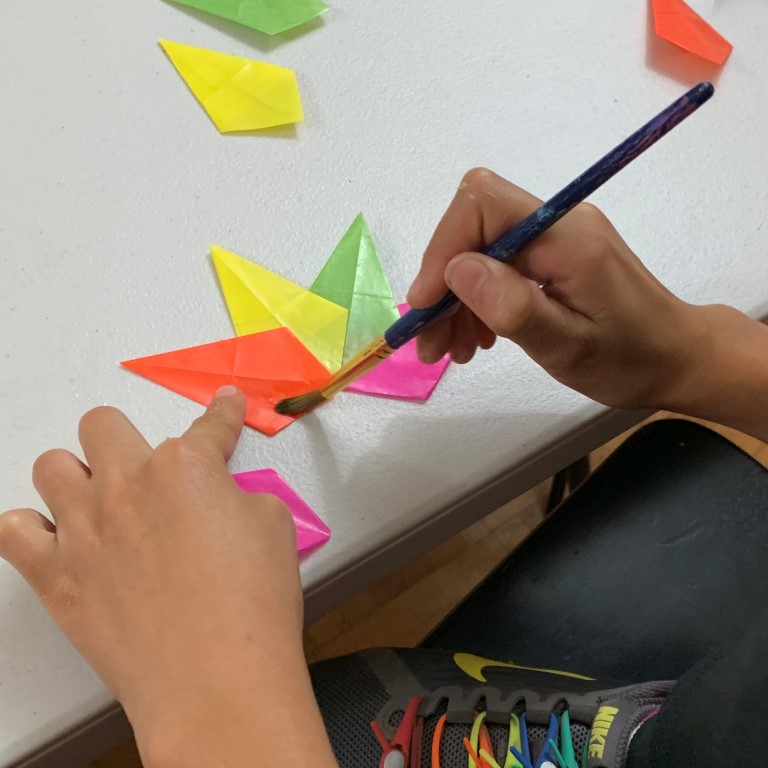
To make the star, first cut the large kite paper squares from the booklet into smaller squares (fourths), as seen in the photo of supplies above.

You will need 8 small squares.

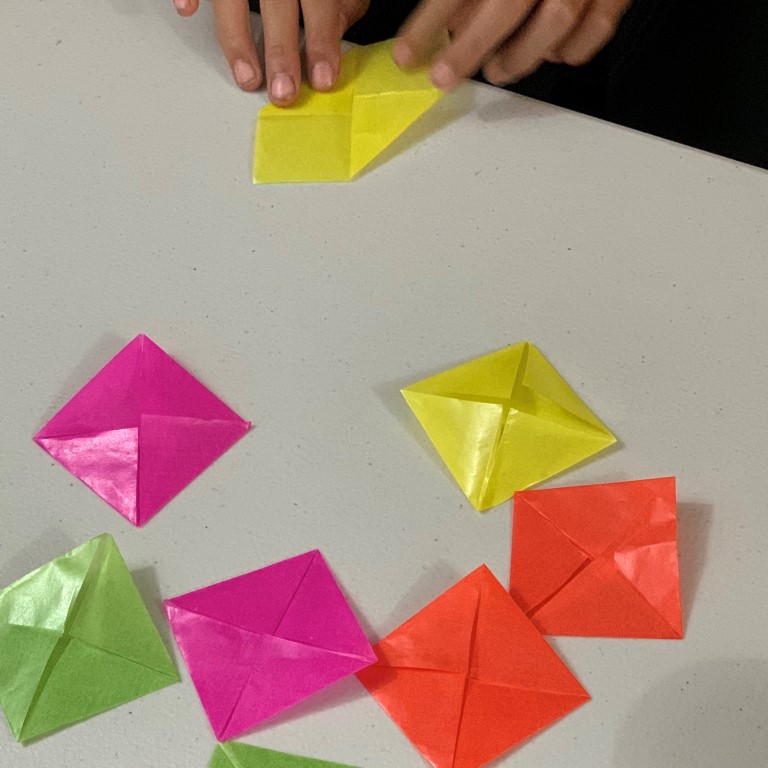
Fold each of the 8 small squares in half, then in half again.

Then fold each corner to the middle as seen here.

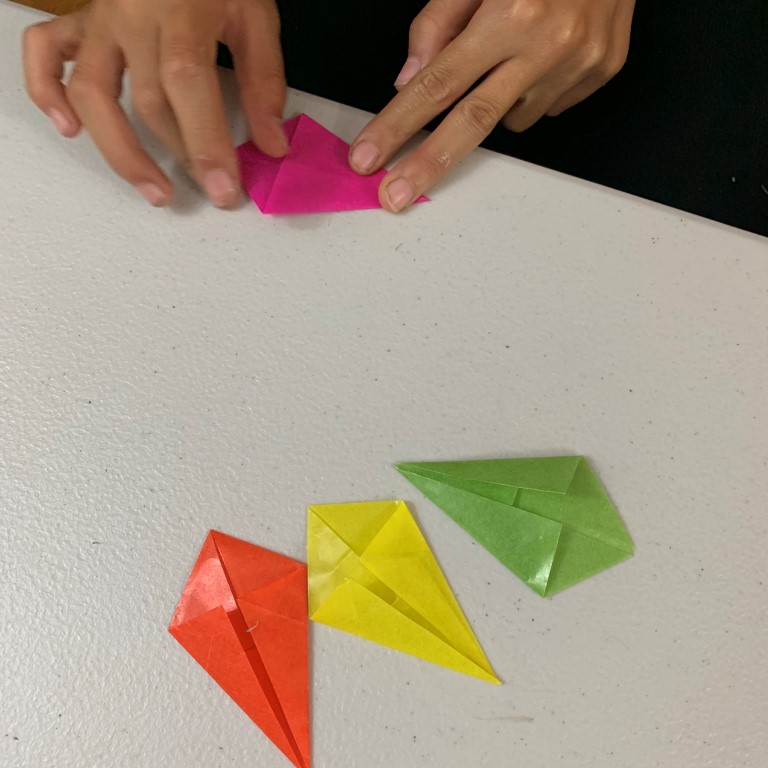
Next, fold two edges into the center of each square to form the points of the star.

Glue the points together one at a time.

The last step to finish up your star will require you to pull up the right side of the point you started with (as seen here) and glue it down flat.

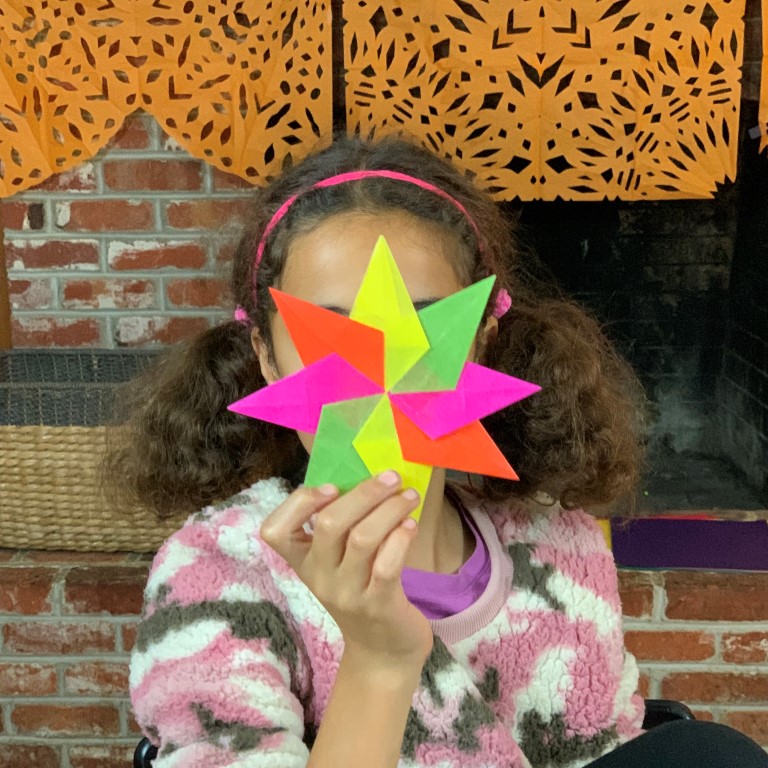
Viola, you now have a paper start for your lantern!

For a great video tutorial on how to make these stars, click here (I did!).

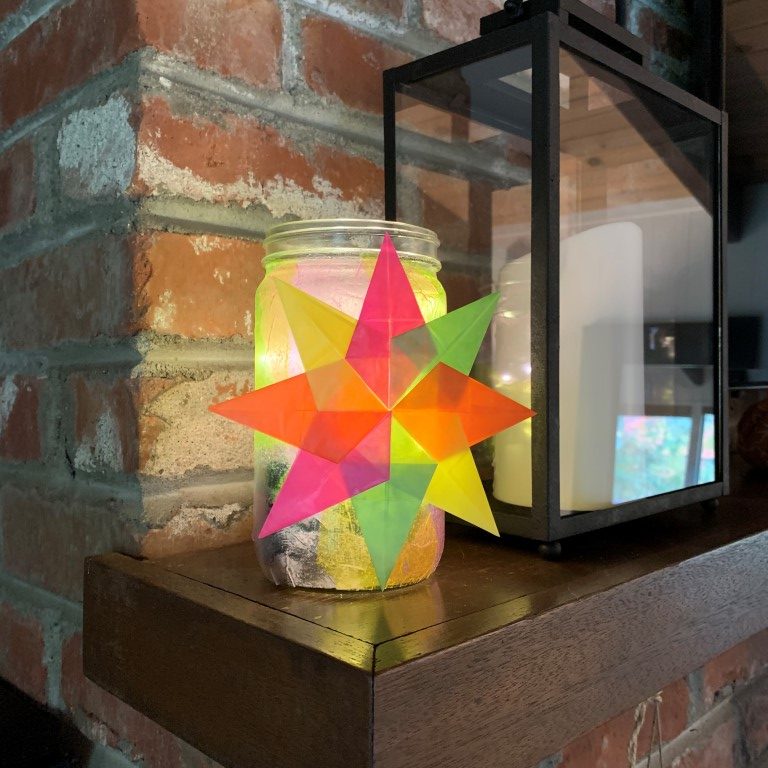
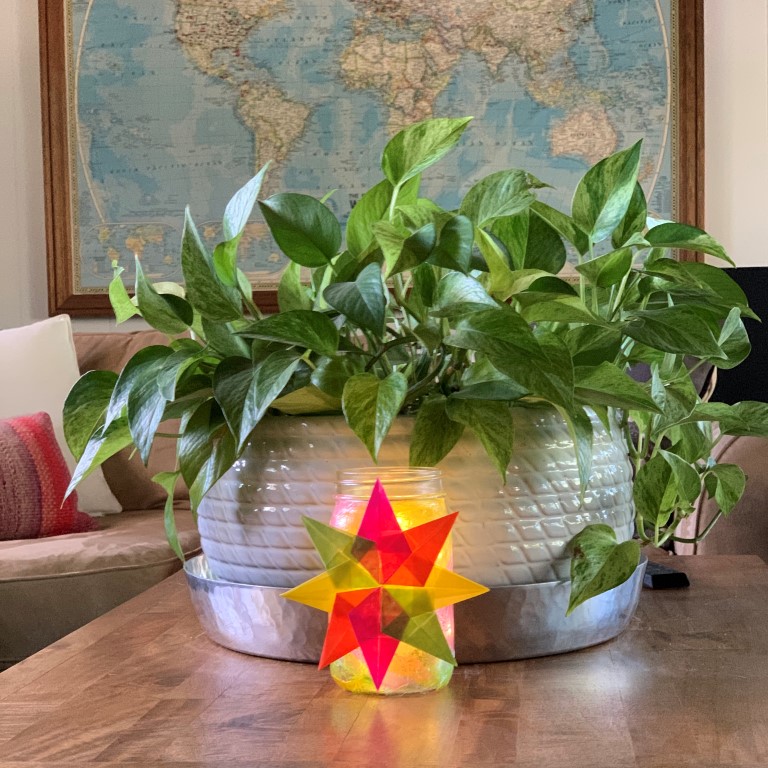
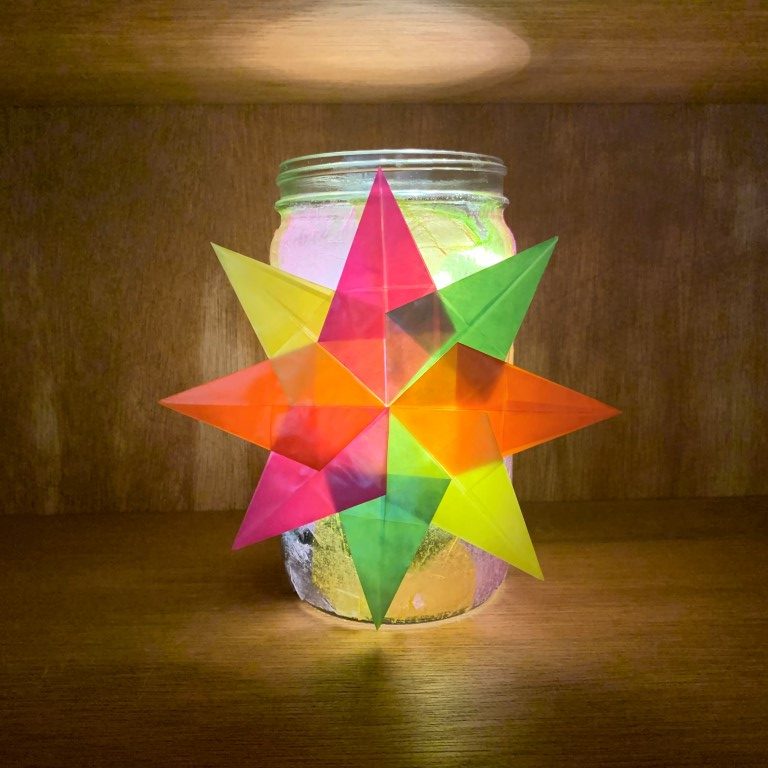
Glue the star to the front of the lantern, put the battery-powered lights inside, and enjoy its beauty, day…

…and night!

To learn more about Germany, be sure to print our FREE Germany Country Facts board

What types of lanterns have you made with your children or students? 

I invite you to leave a comment about this Germany craft for kids below.

Please follow and like us:
onpost_follow
A Germany Country Facts Board for Your Home, Homeschool, or Classroom

A Germany Country Facts Board for Your Home, Homeschool, or Classroom

Please follow and like us:
onpost_follow

Thinking about studying Germany with your children, homeschool group, or students?

Traveling to Germany for your next family trip?

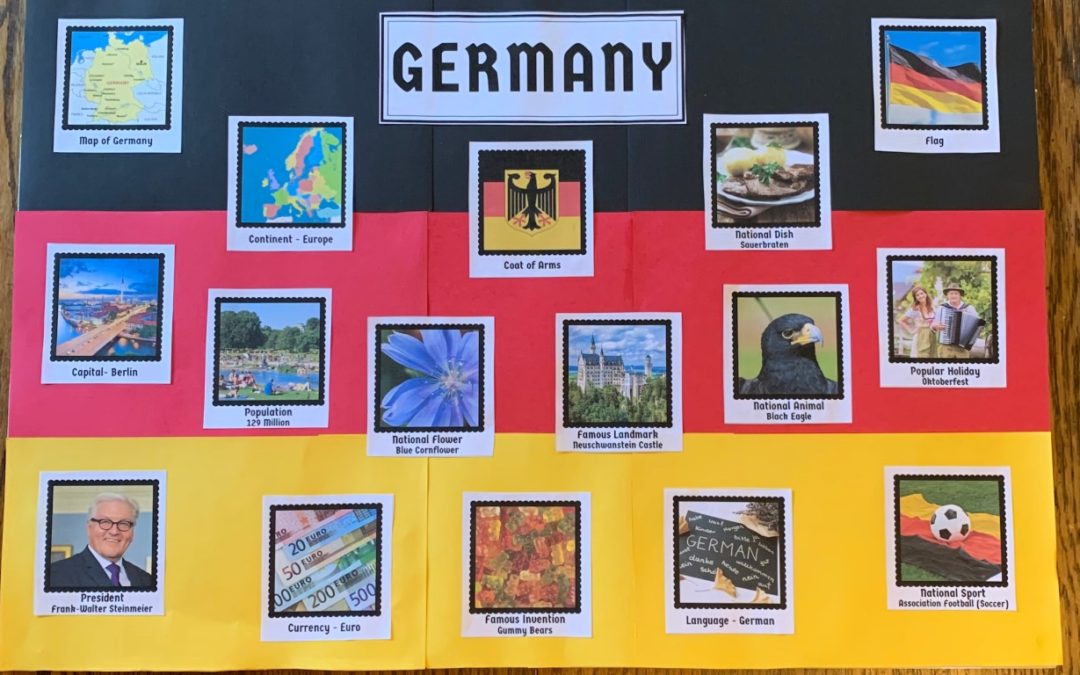
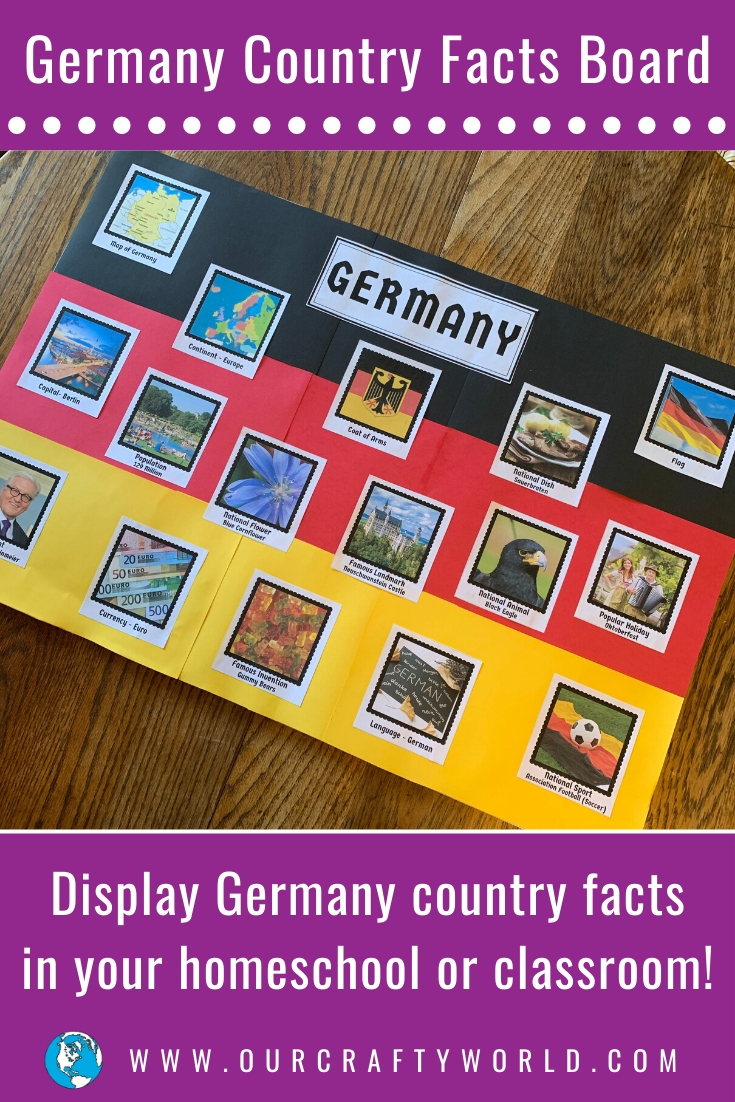
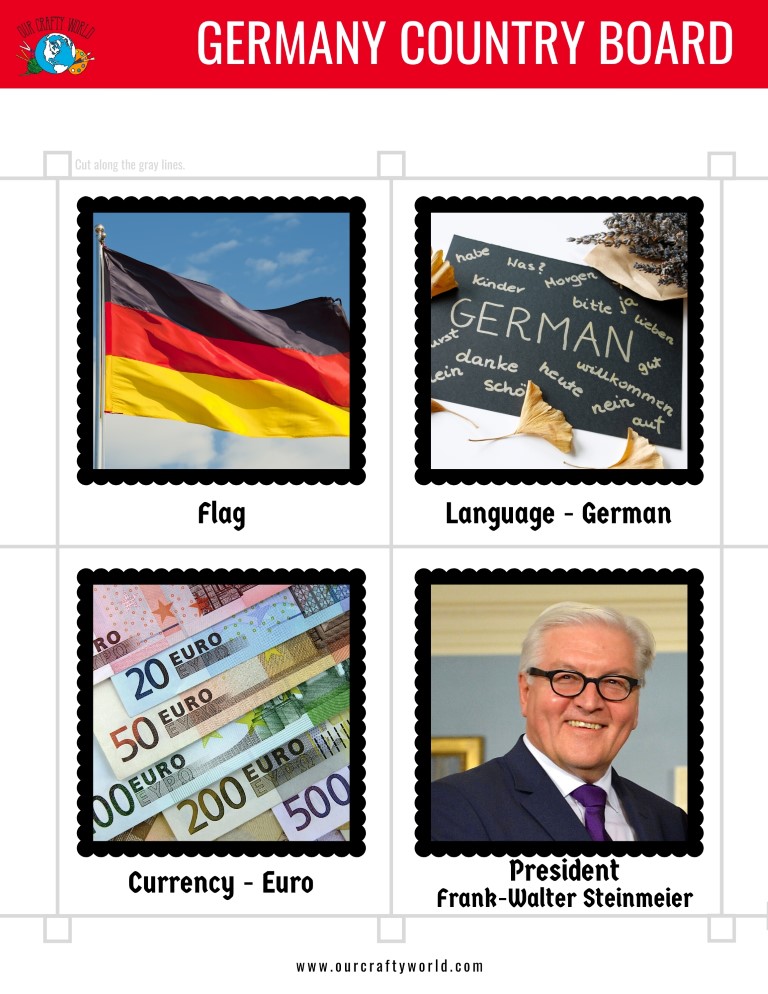
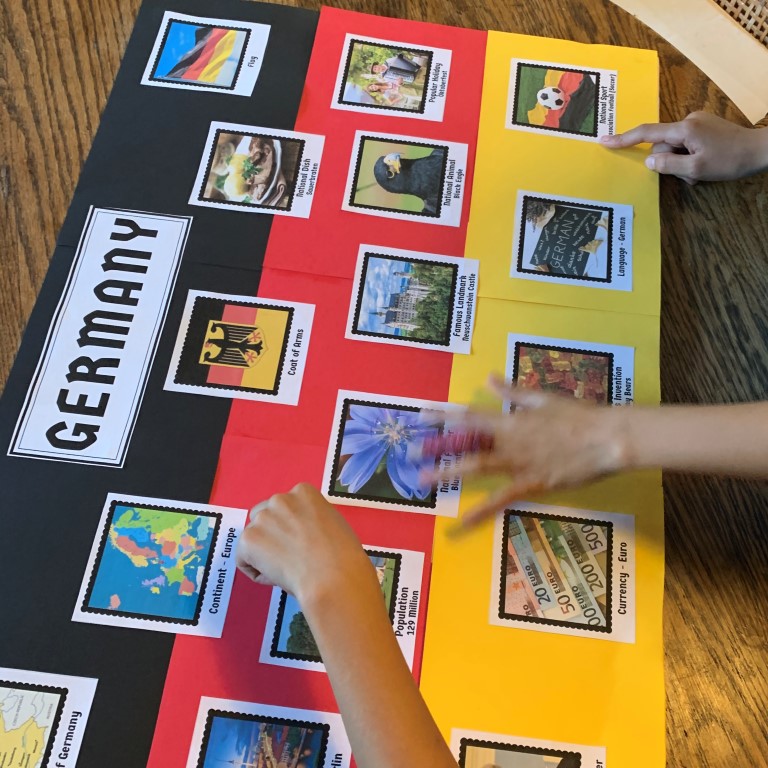
Download our FREE Germany Country Facts Board printable to teacher children basic country facts – quickly!

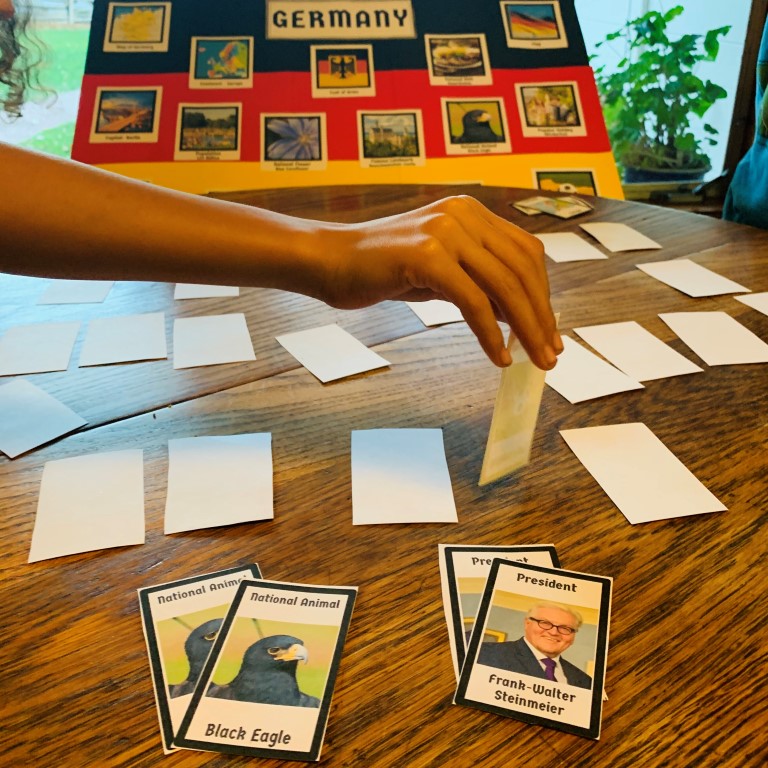
The cards for the board provide so many interesting facts and lead to a myriad of talking poionts and conversations with your children or students. 

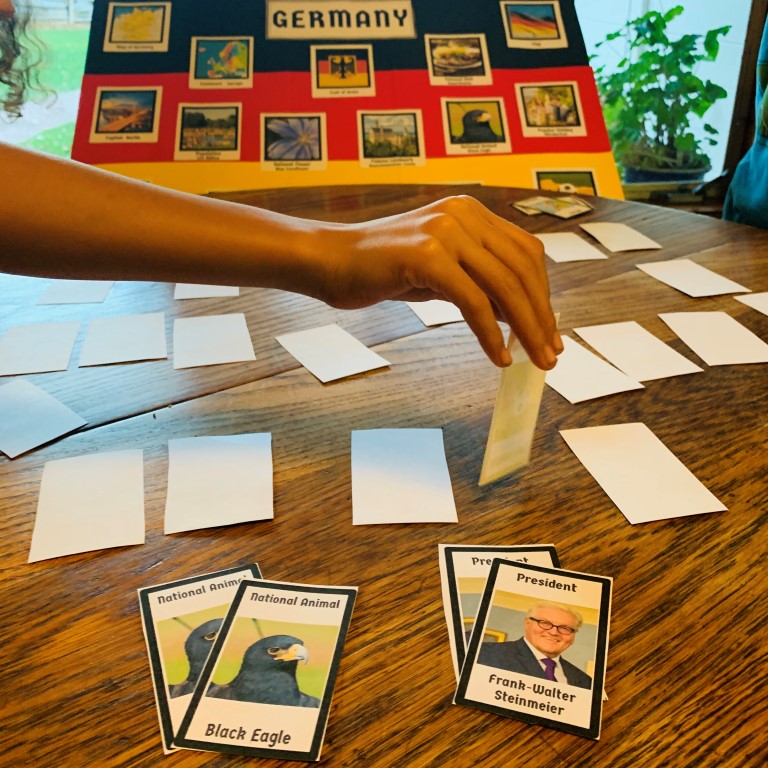
If you’re studying Germany in your class or homeschool gropu then this board will provide a great foundation for learning about the country as a whole, especially when coupled with our Germany Concentration Game.

And if you’re a lucky one who just so happens to be planning your next family trip to Germany, having this board in your house prior to the trip will open up wonder and hidden nuggets of curiosity about the country before you even get there. 

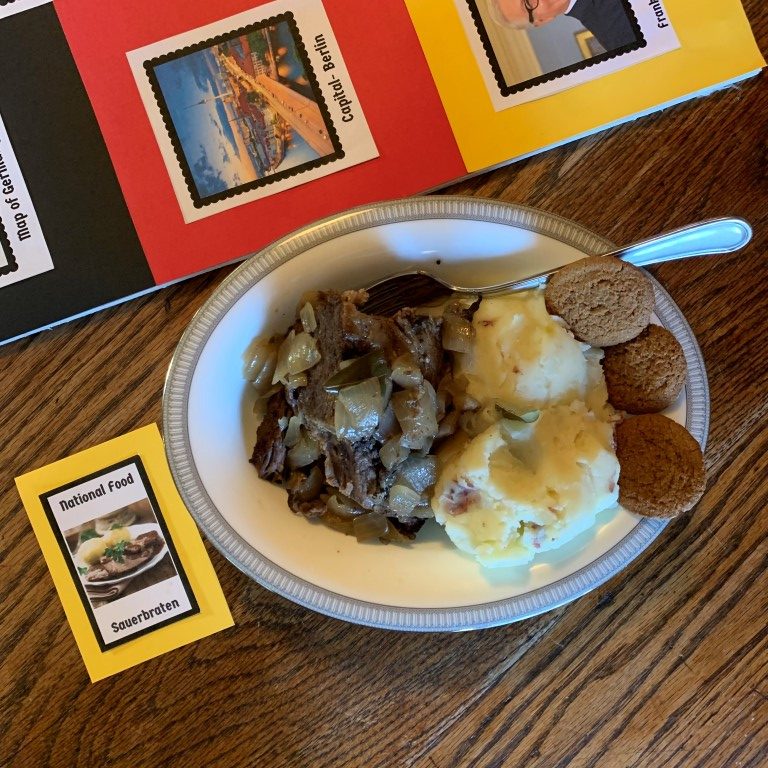
It may even spark some fun family activities before you go, like cooking sauerbraten, Germany’s national dish!

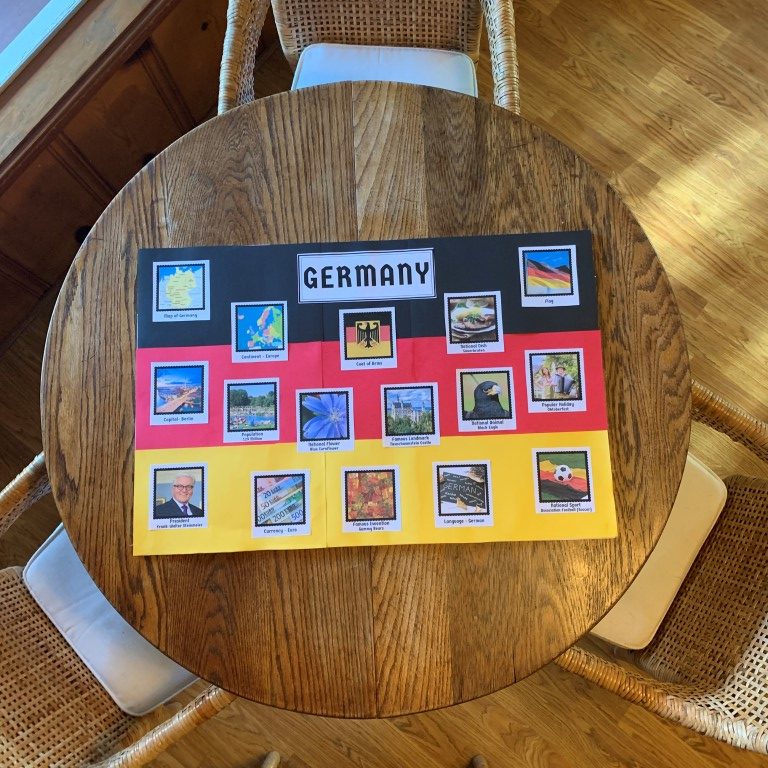
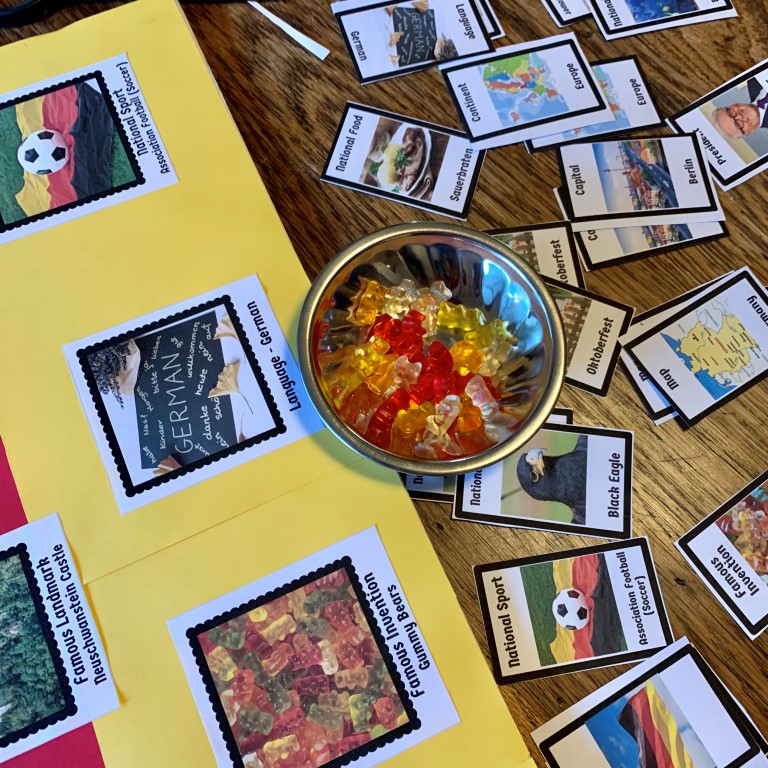
To make a country board that looks like the Germany flag as seen in this post, you will simple need black, red, and yellow paper, scissors, a glue stick, and our FREE Germany Country Facts Board printable.

Kids love to help make tehse boards so be sure to put them to work. : ) 

Place prominently in your home, homeschool, or classroom.

In yesterday’s Germany class, I just plopped it right on the table to sit around, discuss, and enjoy.

Here is an example of what the pages look like.

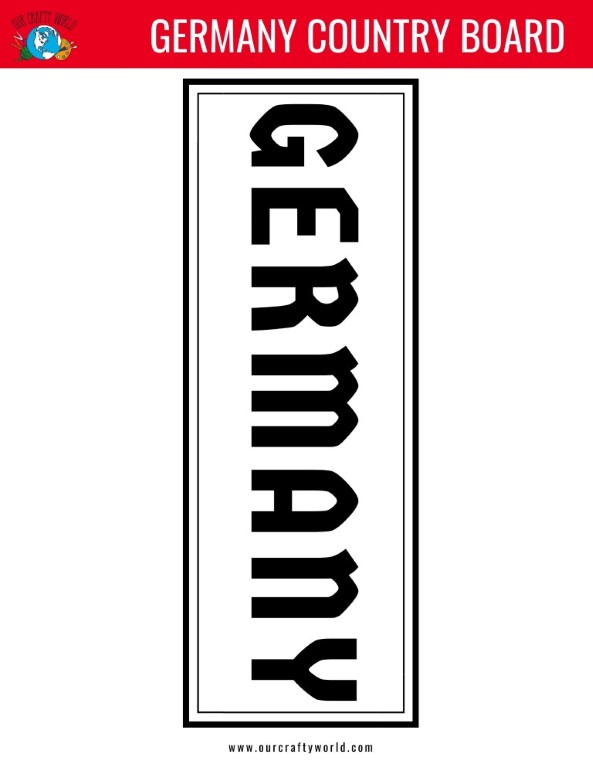
I have also included a header for the board.

Enjoy the process of making this board with your children or students…and be sure to offer up some Gummy Bears along the way!

If you are interested in my FREE country board printables for Mexico and Ireland, click here:

Mexico Country Facts Board

Ireland Country Facts Board

Also, be sure to read the following blog posts about how to celebrate Germany’s St. Martin’s Day in a very unique way.

How to Make a Weckman for Germany’s St. Martin’s Day. A weckman is a sweetened dough boy that is baked and eaten by children to celebrate this holiday.

St. Martin’s Day Lanterns – A Germany Craft For Kids. This is a simple and beautiful paperfolding Germany craft for kids.

Have you ever made a country board as a way to learn about a country? Any creative ways for displaying your board that you want to share?

I invite you to leave a comment about this Germany craft for kids below.

Please follow and like us:
onpost_follow
German Nutcracker Craft For Kids

German Nutcracker Craft For Kids

Please follow and like us:
onpost_follow

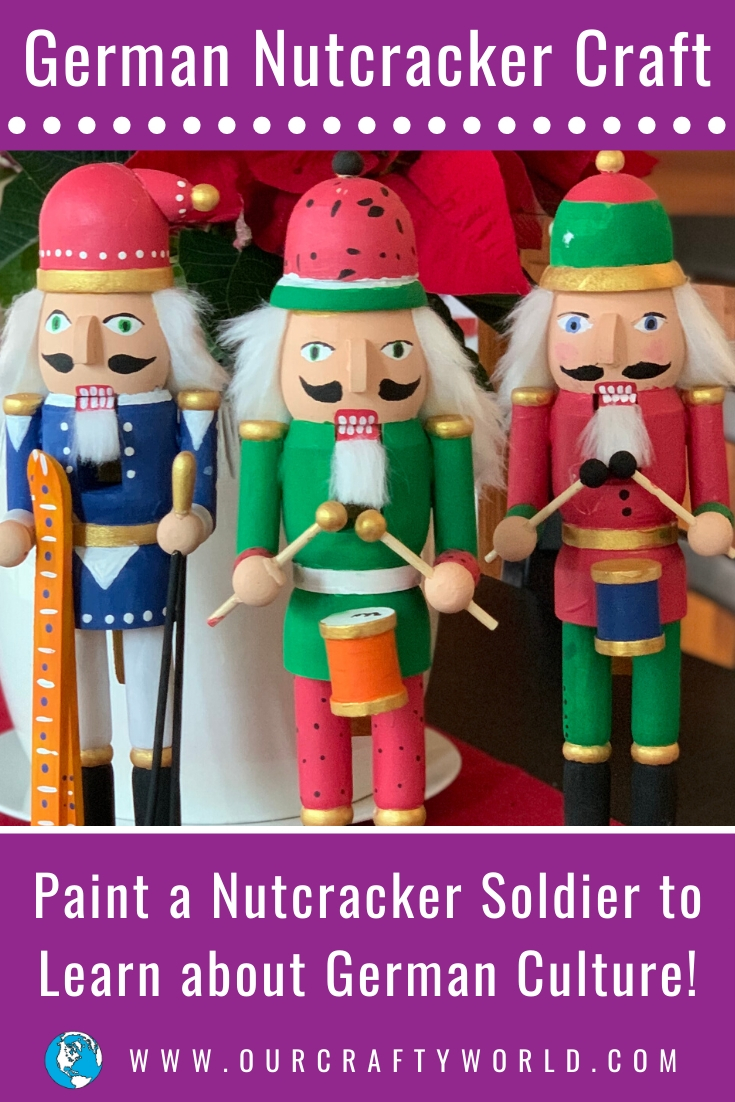
Looking for a Christmas project to spark imagination, creativity, and a new-found knowledge of German culture for your children or students? 

This Germany craft for kids is the ONE!

First, they’re BEAUTIFUL, FESTIVE, and FUN!

And the best part? They can be done over time, adding details and flair as you go, which makes them the perfect craft for kids at home or in a homeschool group.

After studying the history of the nutcracker in our Germany class, we moved right into the project, learning so much as went along.

SUPPLIES

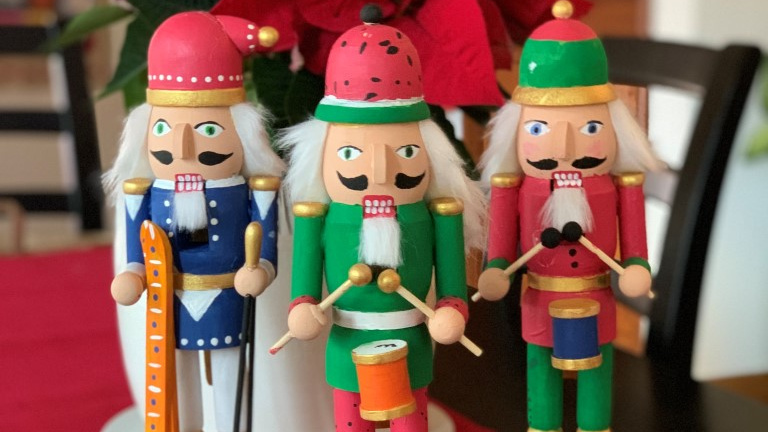
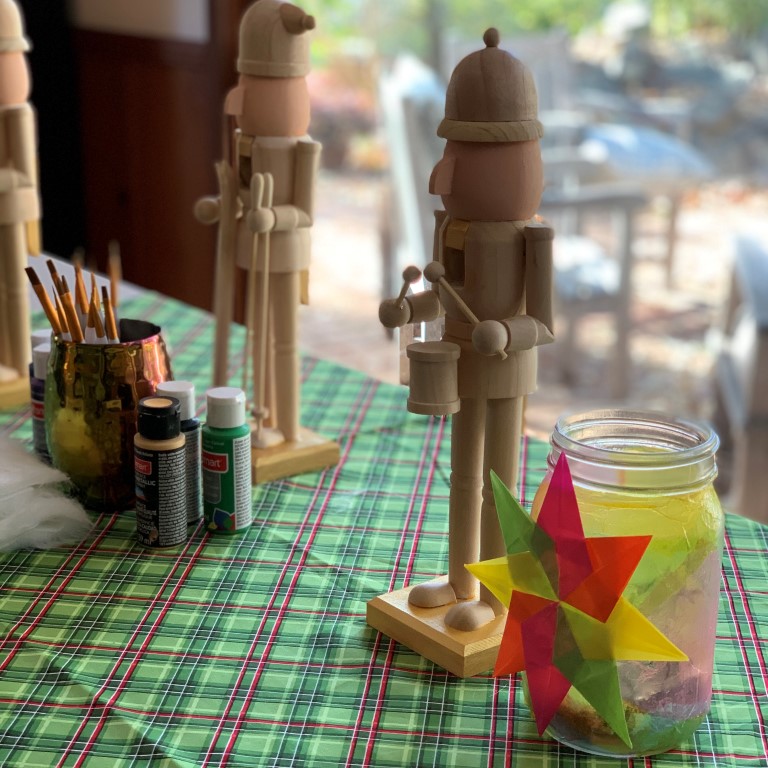
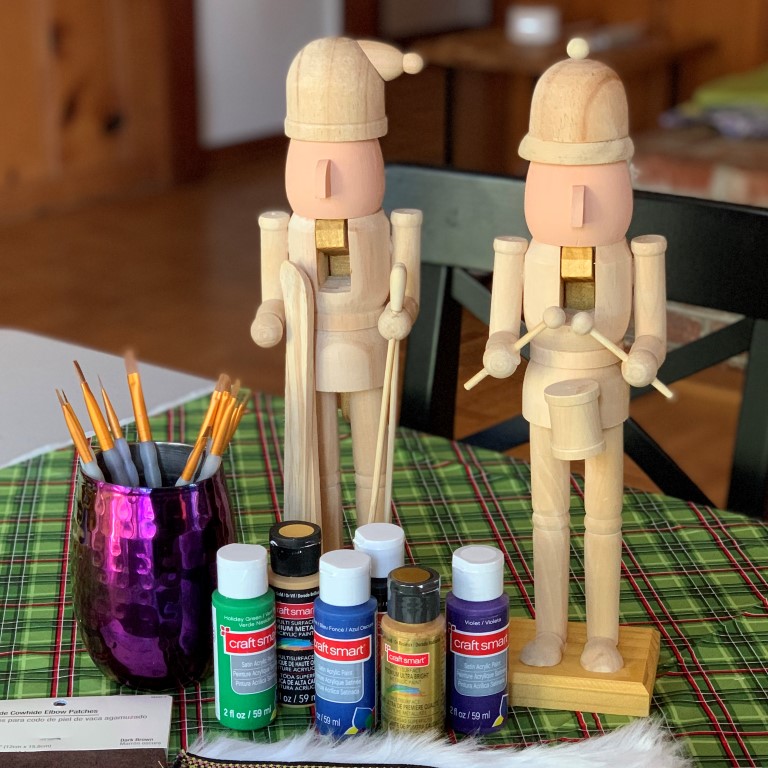
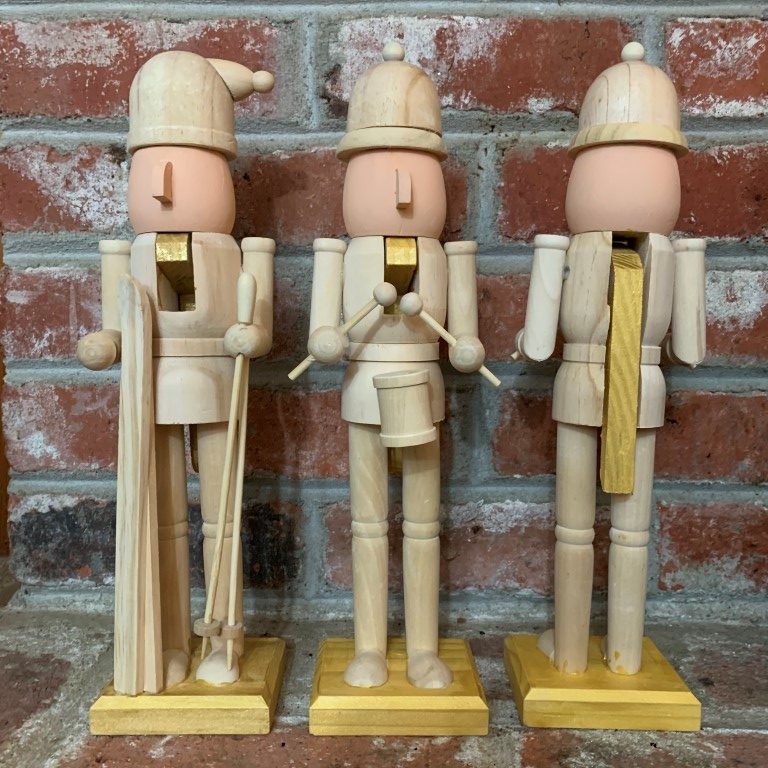
For this project you will need a plain, wooden nutcracker (I found these at Michaels but you can buy them on Amazon), paints in varying colors (definitely include gold, green and red), paint brushes in medium to extra fine brush sizes, craft hair (Michaels or Amazon), and a glue gun.

PREP THE PROJECT

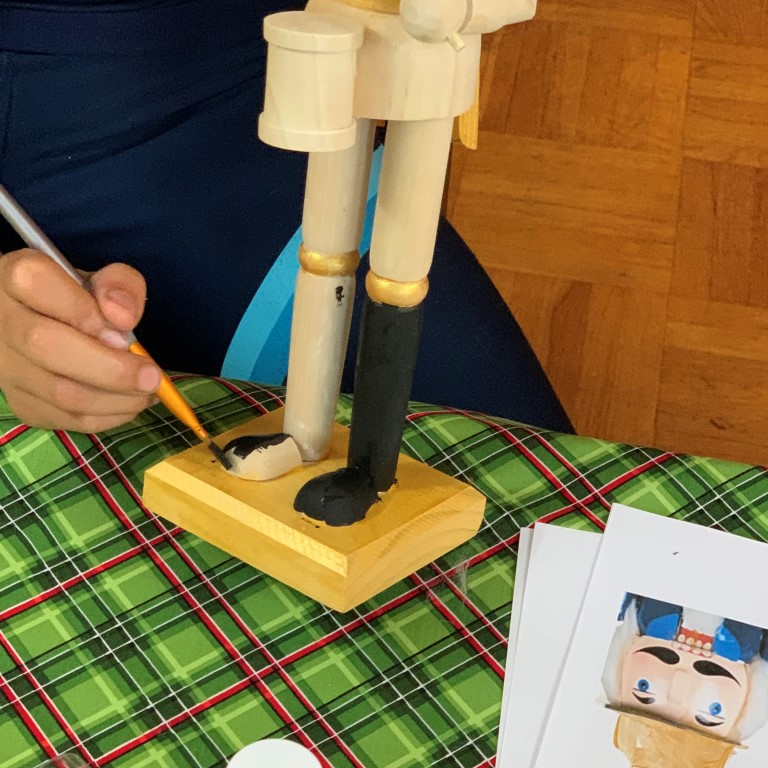
To jumpstart the project, I painted the base and a few key areas of the nutcrackers gold ahead of time to allow my students to get right to the fun part of painting the uniform, hat, and accessory items like the drum and skis.

PAINT YOUR NUTCRACKER

We started with the boots by painting them black. In hindsight, it would have been fun to paint gold or white laces up the front of them.

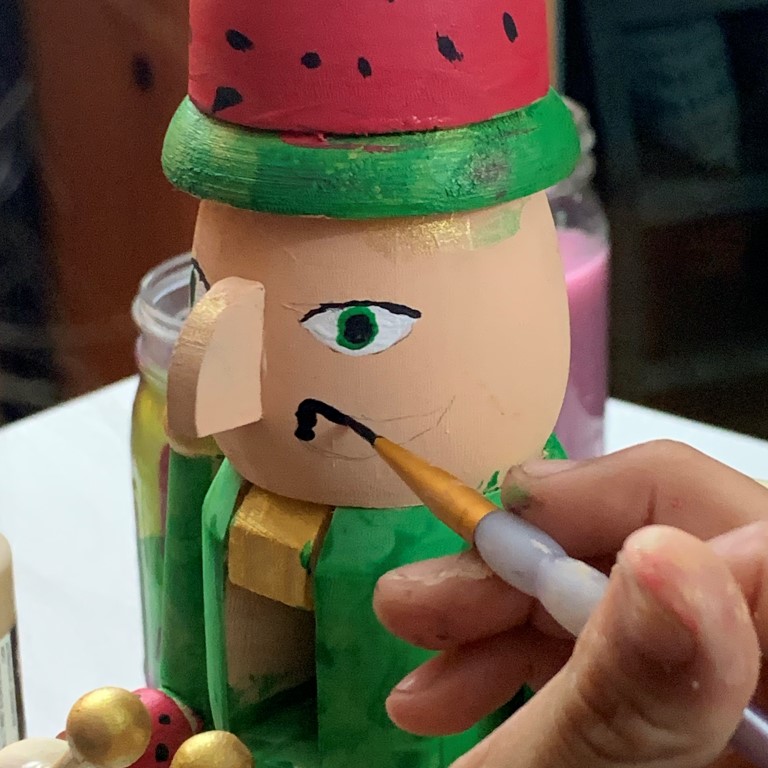
By looking at photos we determined how to paint the eyes and moustache. One student sketched these details in pencil first.

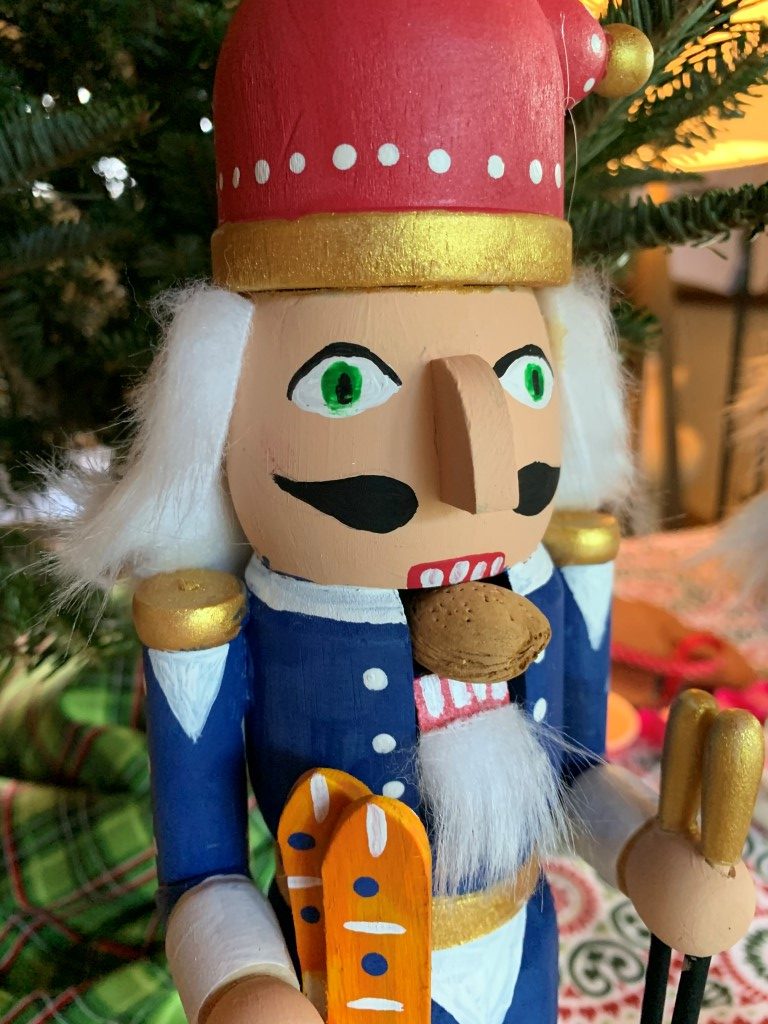
If you look at pretty much any nutcracker, the shape of the mouth and teeth are very consistent, so you can paint them as you see here. Make sure to let the red paint dry before adding the white teeth!

For the hair, wrap it around the circumference of the head to determine where to cut it, paying attention to length as well.

ENJOY YOUR NUTCRACKER

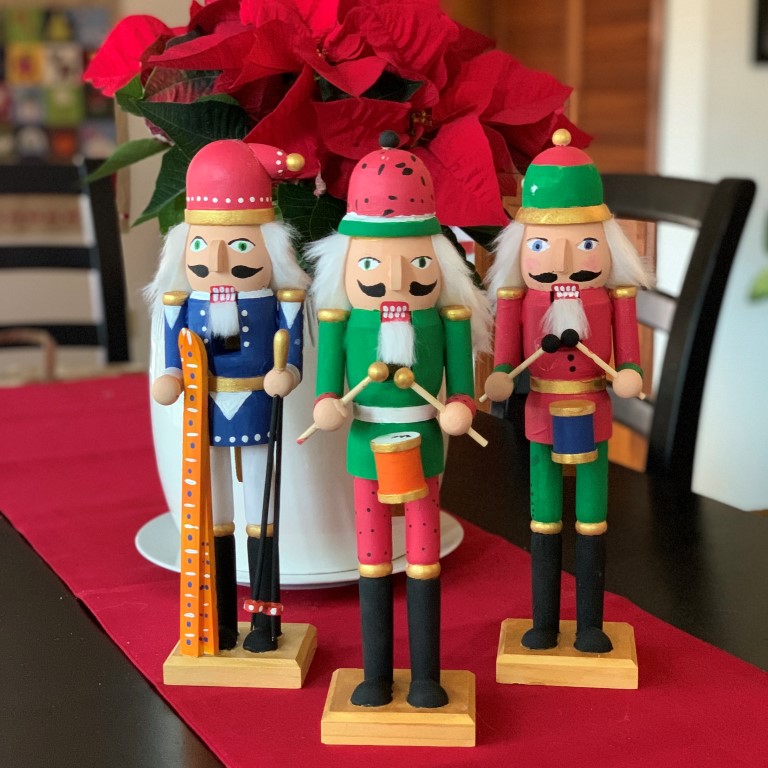
Now that your children or students have their very own nutcracker soldier, display them in all their glory!

Have you ever done a nutcracker craft with your children or students? I’d love to hear about it!

I invite you to leave a comment about this Germany craft for kids below.

Please follow and like us:
onpost_follow
Facebook
Facebook
Pinterest
Pinterest
Instagram
Wordpress Social Share Plugin powered by Ultimatelysocial
Pinterest
Pinterest
fb-share-icon
Instagram